Adding search to your Contentstack-powered site? We got you covered. We’re big fans of Contentstack here at Algolia for its flexibility, so we’ll show you how we make use of that flexibility to seamlessly make our Contentstack sites searchable.
The goal
- We’re going to connect Contentstack and Algolia such that any new data we add to Contentstack automatically gets indexed by Algolia. Ideally, once the integration is up and running, we should never have to manually move records around, and all new content should be immediately discoverable by our users.
- Then, we’ll add that search functionality directly to new page on our Contentstack-powered site so that our users can access it.
Contentstack Automations
Contentstack gives you the power to automate your workflow with a pipeline-based model. You can set up an action that triggers the automation, and then everything in the pipeline sequentially executes. Since they let you add connections to myriad different applications and APIs, this can be used to pipe the data Contentstack stores almost anywhere.
For example, create a new Project from the Automate tab of the dashboard. Inside that project, create an Automation and name it whatever you’d like.

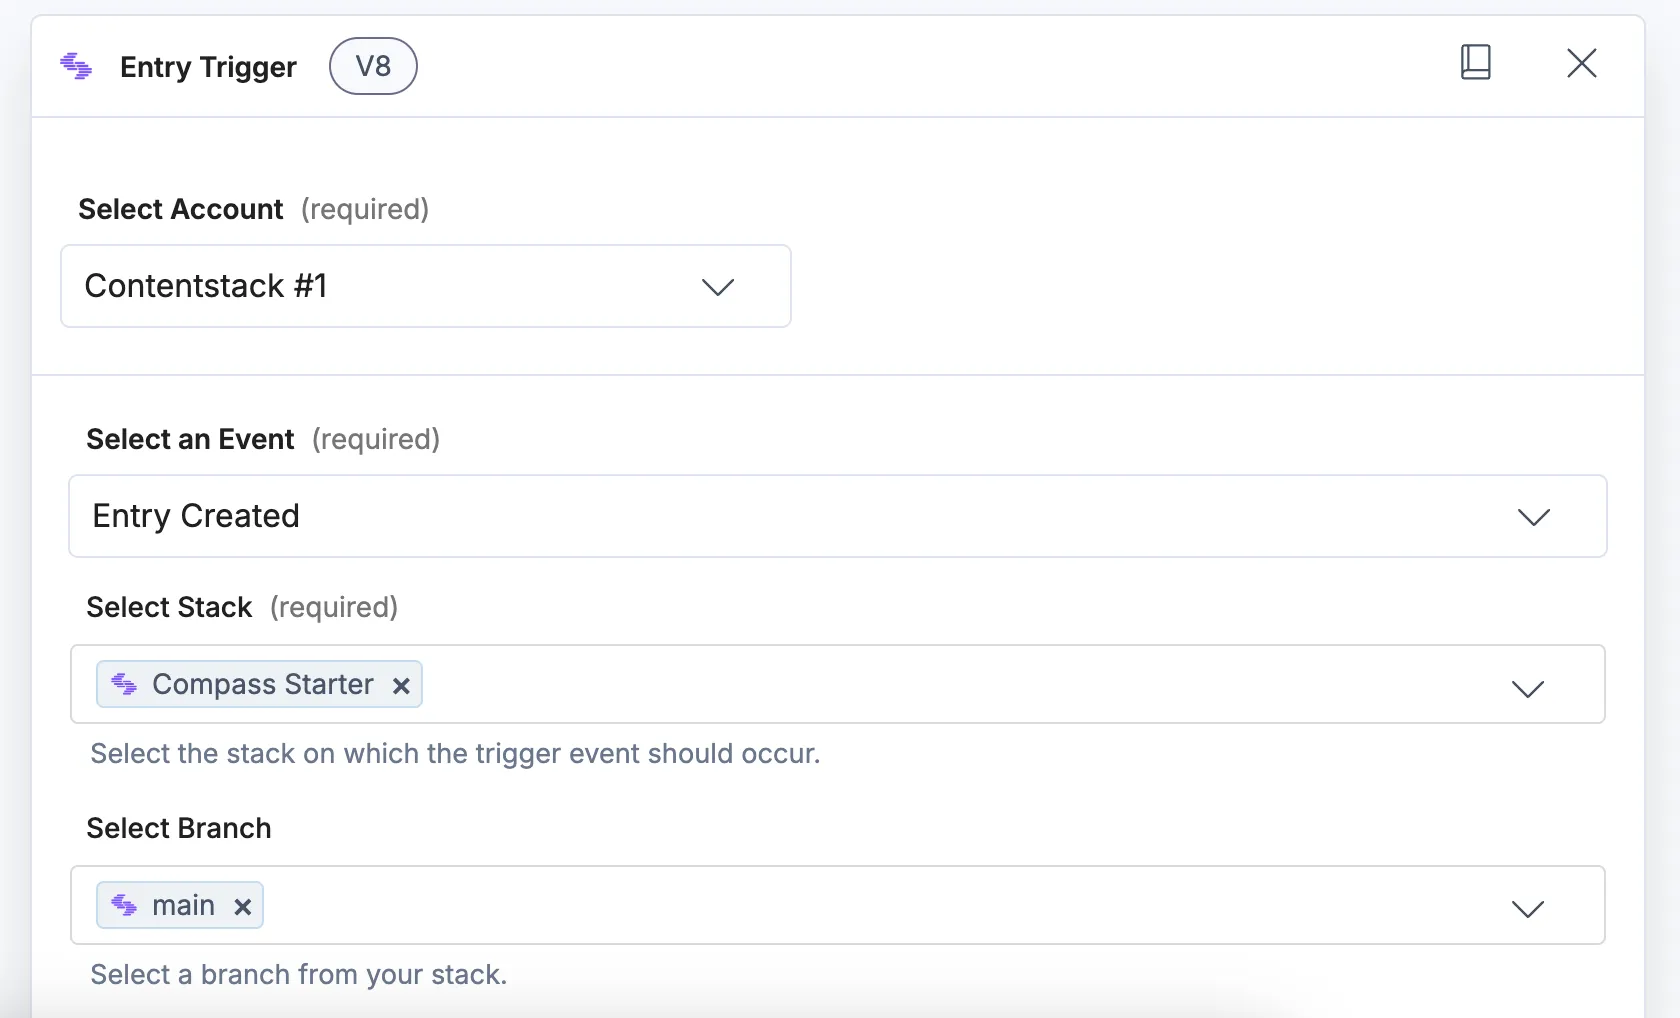
Next, choose Contentstack, then Entry Trigger. This will make the automation start running when an entry in the CMS is modified.

Then, select the account, stack, and branch you want to update Algolia’s records from. Set the Event to All for now.
Save your Trigger, and then create a new Action Step. This Action Step will only run when the Trigger kicks off the whole automation. Since we’ve set the automation to be triggered by modifications to the list of Entries storied in Contentstack, we can put our Algolia updating logic here to keep our index up-to-date.

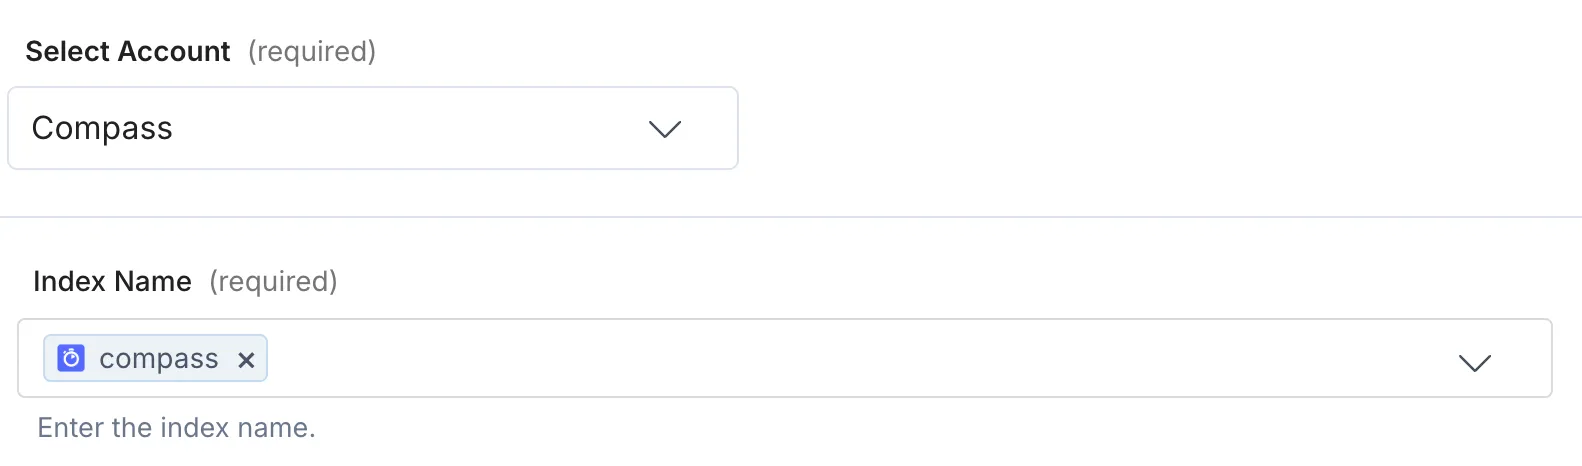
Select the Algolia action connector, then select Index Entries.

Connect your Algolia account and choose your index. You will have to create one in Algolia if you haven’t already.
The Entries field is the JSON data that will end up stored as a record in the Algolia index. This is where your actual use case will start affecting things. Whatever you decide to store in Algolia, here are a few principles in mind:
- It should be in JSON format, and the entire stored object should be type-consistent. It would be a lot harder to search through the index if each record had different keys with different value types.
- You’ll need some unique value to differentiate each record stored in the
objectID key. Fortunately, Contentstack keeps track of this internally and exposes it as the body.data.entry.uid key, so we can just use that unless you have a specific reason not to.
- Contentstack is our source of truth, so we only need to store in Algolia the attributes that affect search somehow.
- Ideally, we’ll limit the use of nested arrays and objects because the search algorithm compares first-level attributes. If the algorithm has to flatten nested arrays and objects, that uses precious time and resources and makes everything unnecessarily messy.
Here’s what I ended up going with:
{
    "objectID": "{{1.body.data.entry.uid}}",
    "url": "{{1.body.data.entry.url}}",
    "title": "{{1.body.data.entry.title}}",
    "tags": {{1.body.data.entry.tags}},
    "components": {{1.body.data.entry.components}},
    "content_type": "{{1.body.data.content_type.uid}}"
}
Test the action when prompted and make sure everything loaded into your Algolia index right. When you’re ready, flip the Activate Automation toggle switch and we’ll get to testing.

To make sure your automation works, make an update to entries in the stack you selected earlier. Even just republishing an existing entry or creating a new blank one will trigger the automation, and you’ll see those changes propagate to your Algolia index.
Once you’ve loaded the index with all the necessary data, just set your searchableAttributes and your whole site will be searchable! Just include an InstantSearch setup in the frontend code of your site to let your users access this functionality. InstantSearch’s widget-based setup makes installation as easy or as complex as your use case needs, so it’s worth diving in for your first prototypes no matter how they evolve.
Automating the bridge between Contentstack and Algolia integration seamlessly merges content and search. It streamlines your workflow, reduces tedious manual effort, and delivers fast and relevant results to your users. If you’re looking to take this integration a step further, here are a few more resources that might point you in the right direction:
 Starten Sie kostenlos
Die weltweit fortschrittlichste KI-Suche
Starten Sie kostenlos
Die weltweit fortschrittlichste KI-Suche AI Browse
Von KI erstellte Kategorie- und Sammlungsseiten
AI Browse
Von KI erstellte Kategorie- und Sammlungsseiten AI Recommendations
Vorschläge überall auf der User Journey
AI Recommendations
Vorschläge überall auf der User Journey Merchandising Studio
Datengestützte Kundenerlebnisse, ohne Code
Merchandising Studio
Datengestützte Kundenerlebnisse, ohne Code Merchandising Studio
Datengestützte Kundenerlebnisse, ohne Code
Merchandising Studio
Datengestützte Kundenerlebnisse, ohne Code Analytics
Alle Ihre Erkenntnisse in einem Dashboard
Analytics
Alle Ihre Erkenntnisse in einem Dashboard UI Components
Pre-built components for custom journeys
UI Components
Pre-built components for custom journeys
.jpg)


%20(2).svg)
