If you are using Algolia to power your category and collection pages you can use the full suite of Algolia tools and rules to show products in the best order to maximize conversion and revenue.
Algolia’s Rules engine allows you to create powerful global rules, make small changes to individual pages, and everything in between. Building on our base relevance model you can layer on AI Re-Ranking, personalization and rules to boost products based on stock position, marketing activity and any other factors you want.
First things first! To use the Merchandising Studio for category page browse actions, it needs to know what attribute(s) in the product data define the category structure. You'll need to configure the category page identifiers:
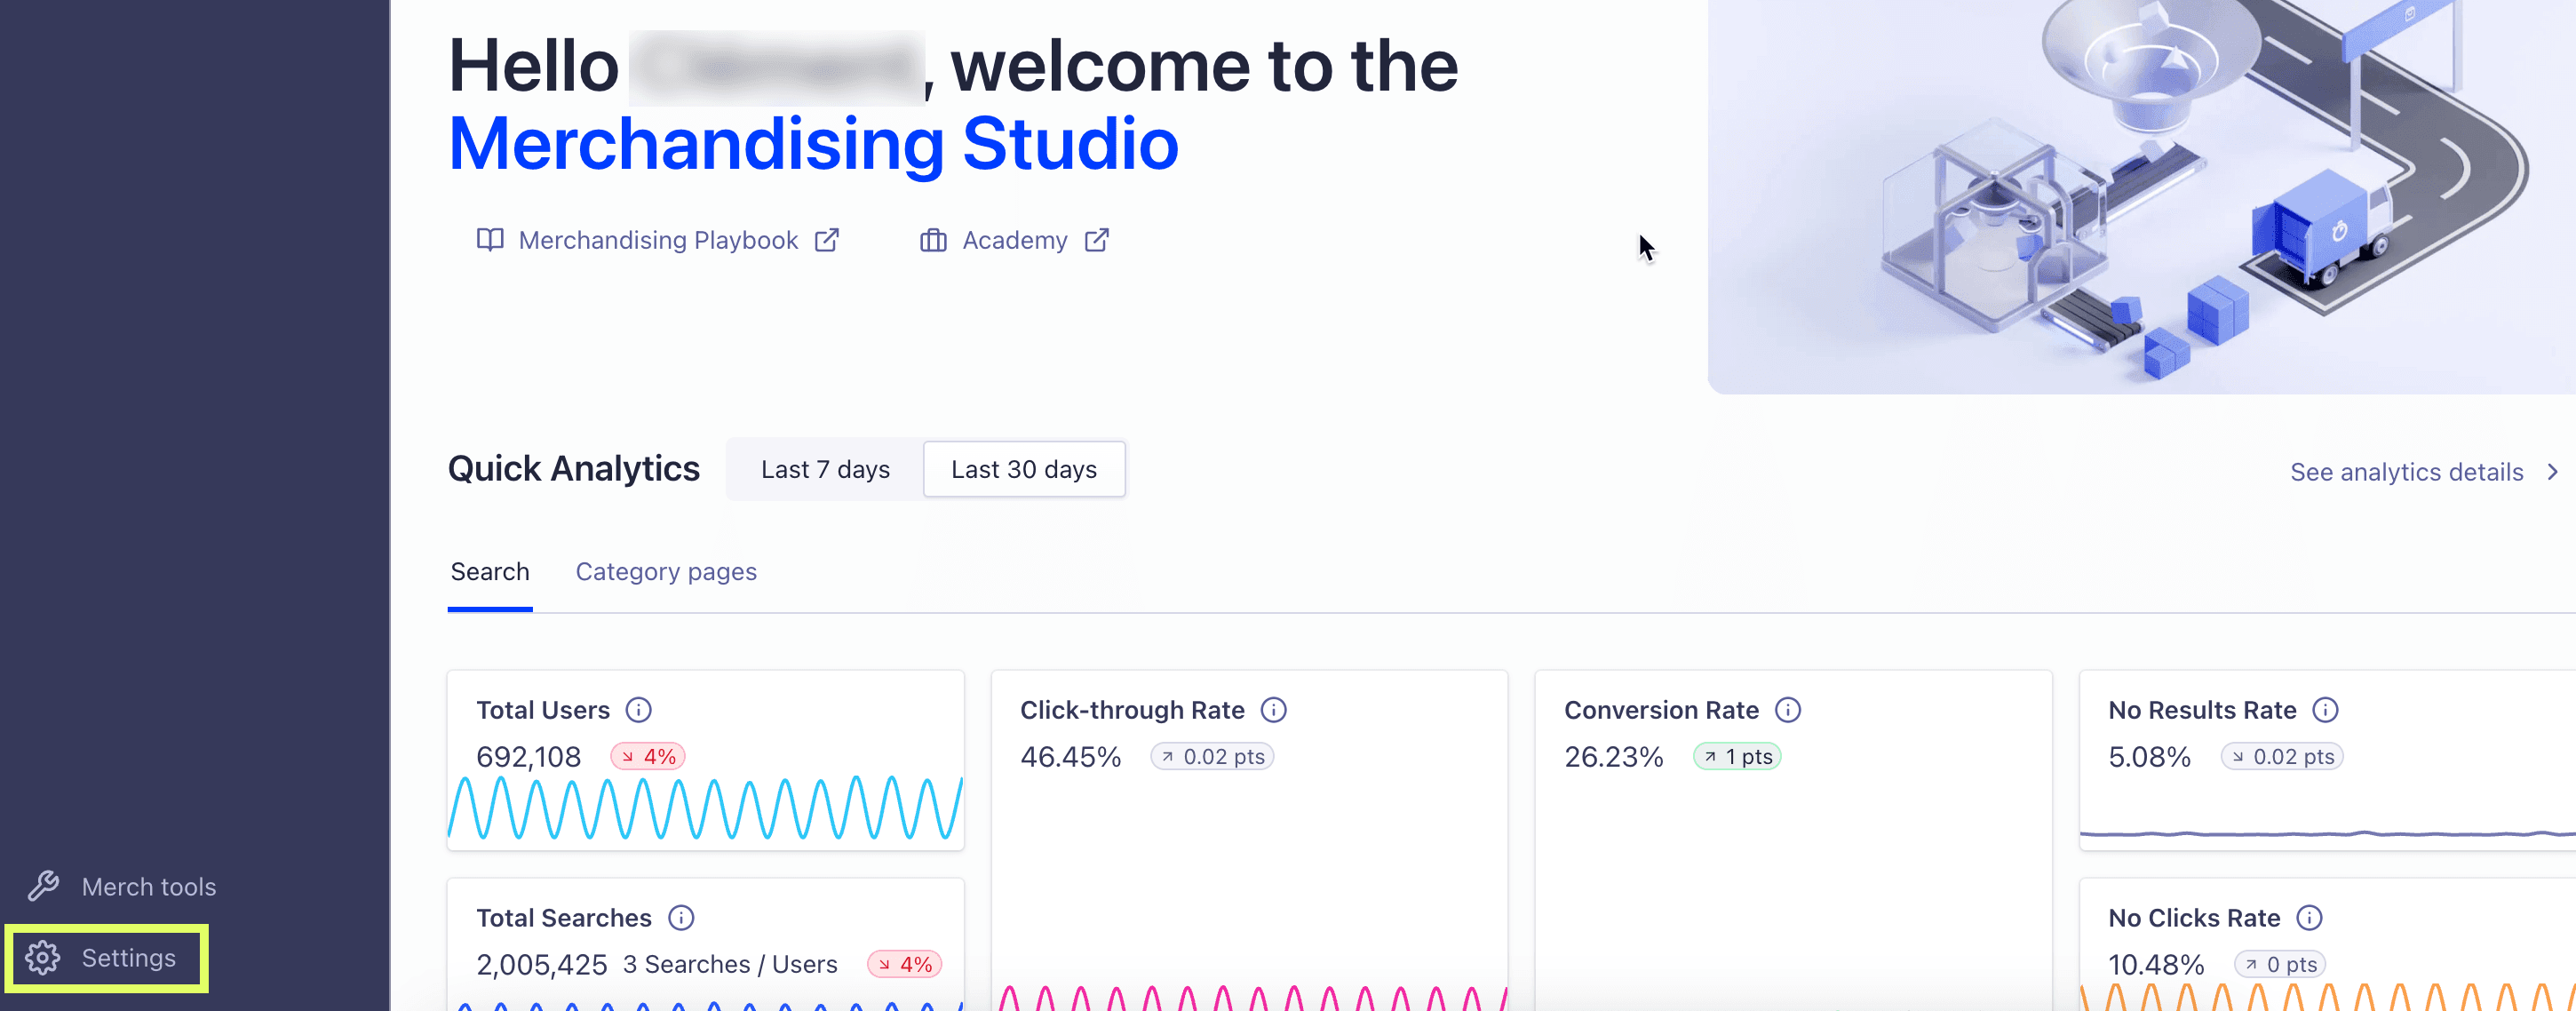
Click the Settings link at the bottom of the left-hand navigation.
Select Category Page Identifiers.
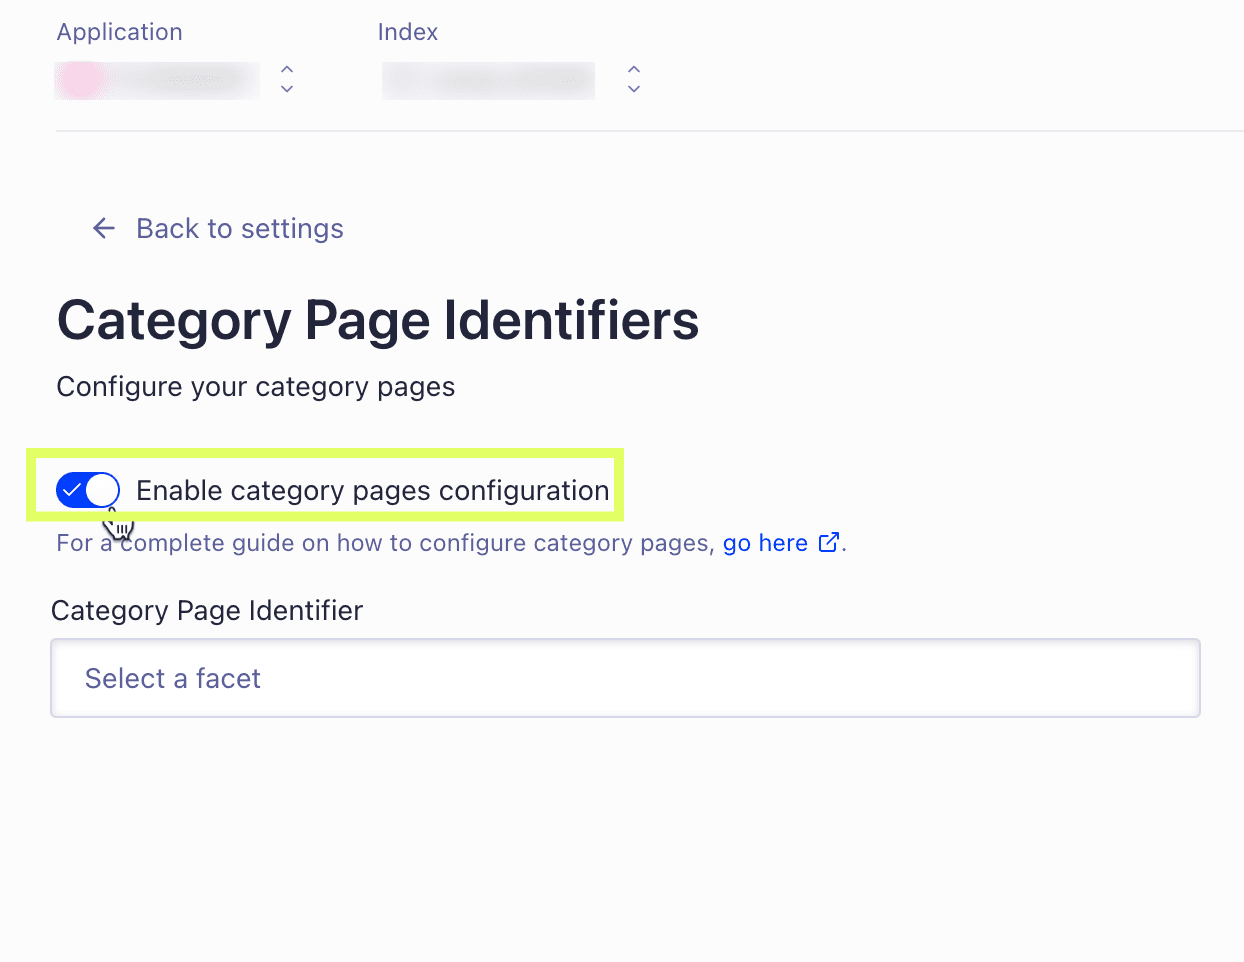
Toggle to enable category category pages configuration.
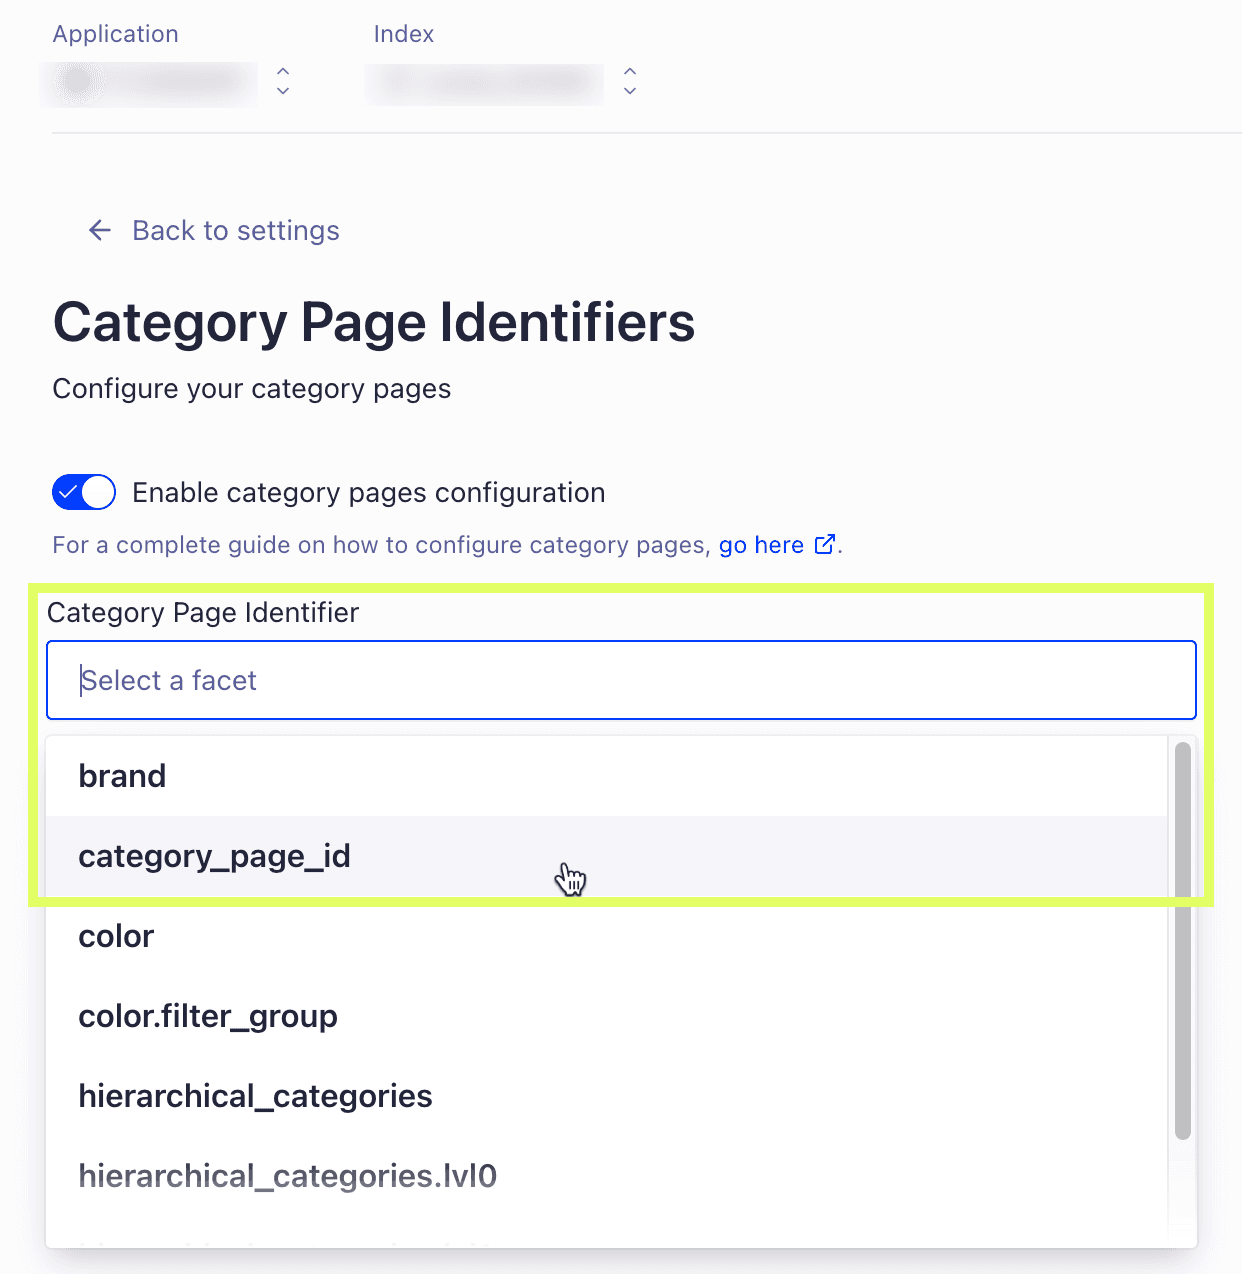
Choose the attribute that contains the category pages.
You are now ready to move on to create merchandising strategies for your category pages and view their analytics.
A few things to note:
To a create merchandising strategy for a category page using the Merchandising Studio Visual Editor, follow these steps:
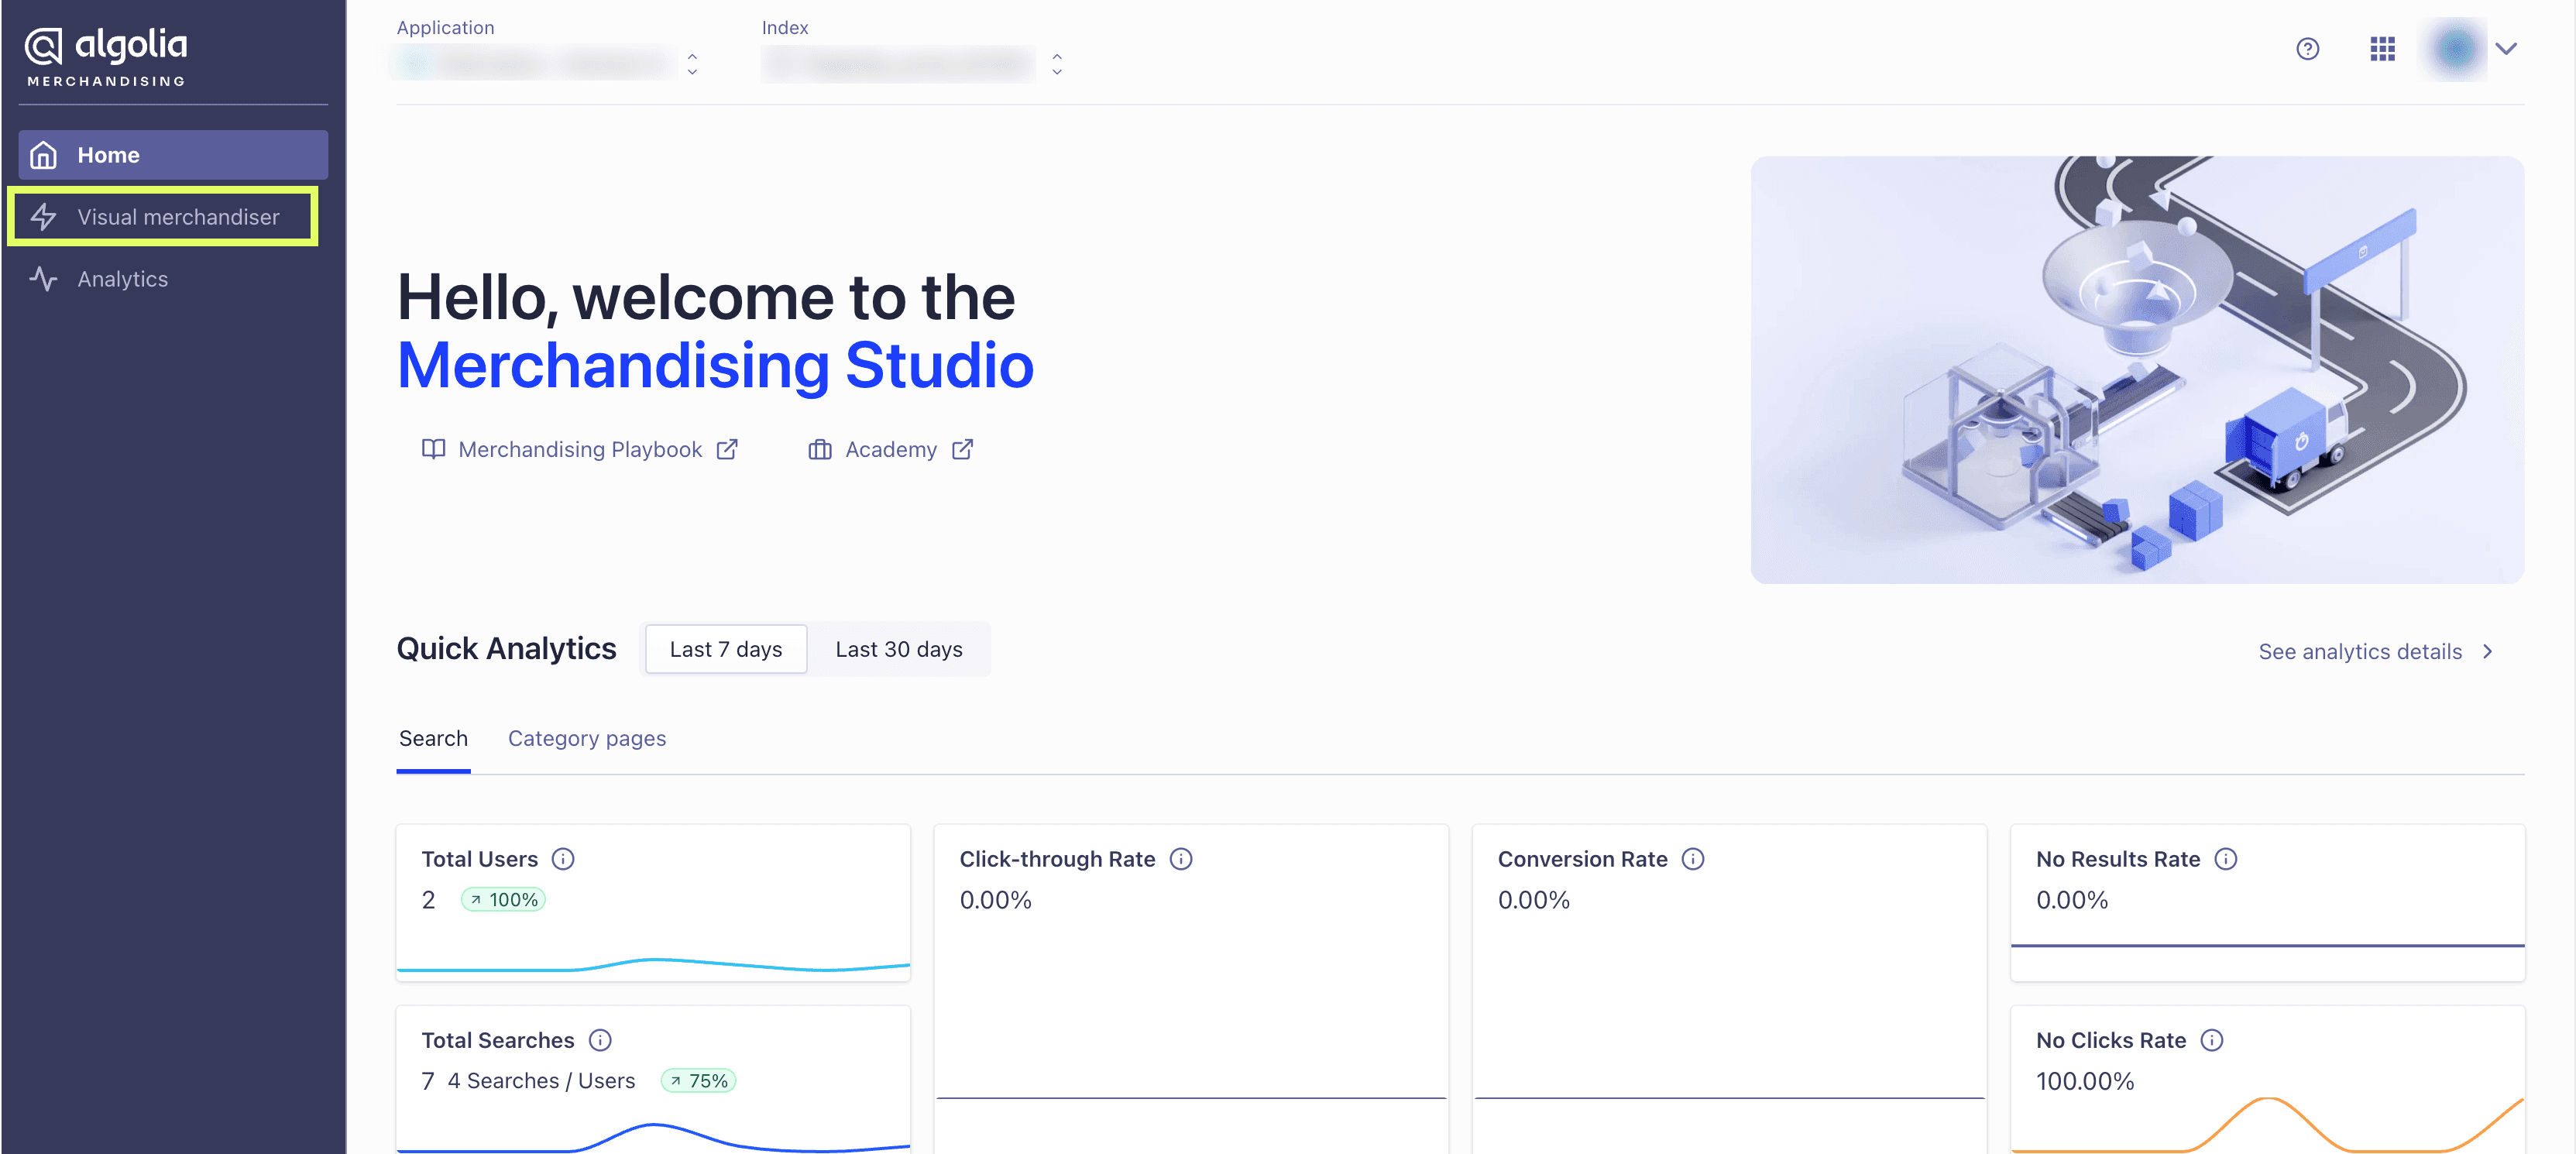
From the Merchandising Studio homepage, click Visual merchandiser.
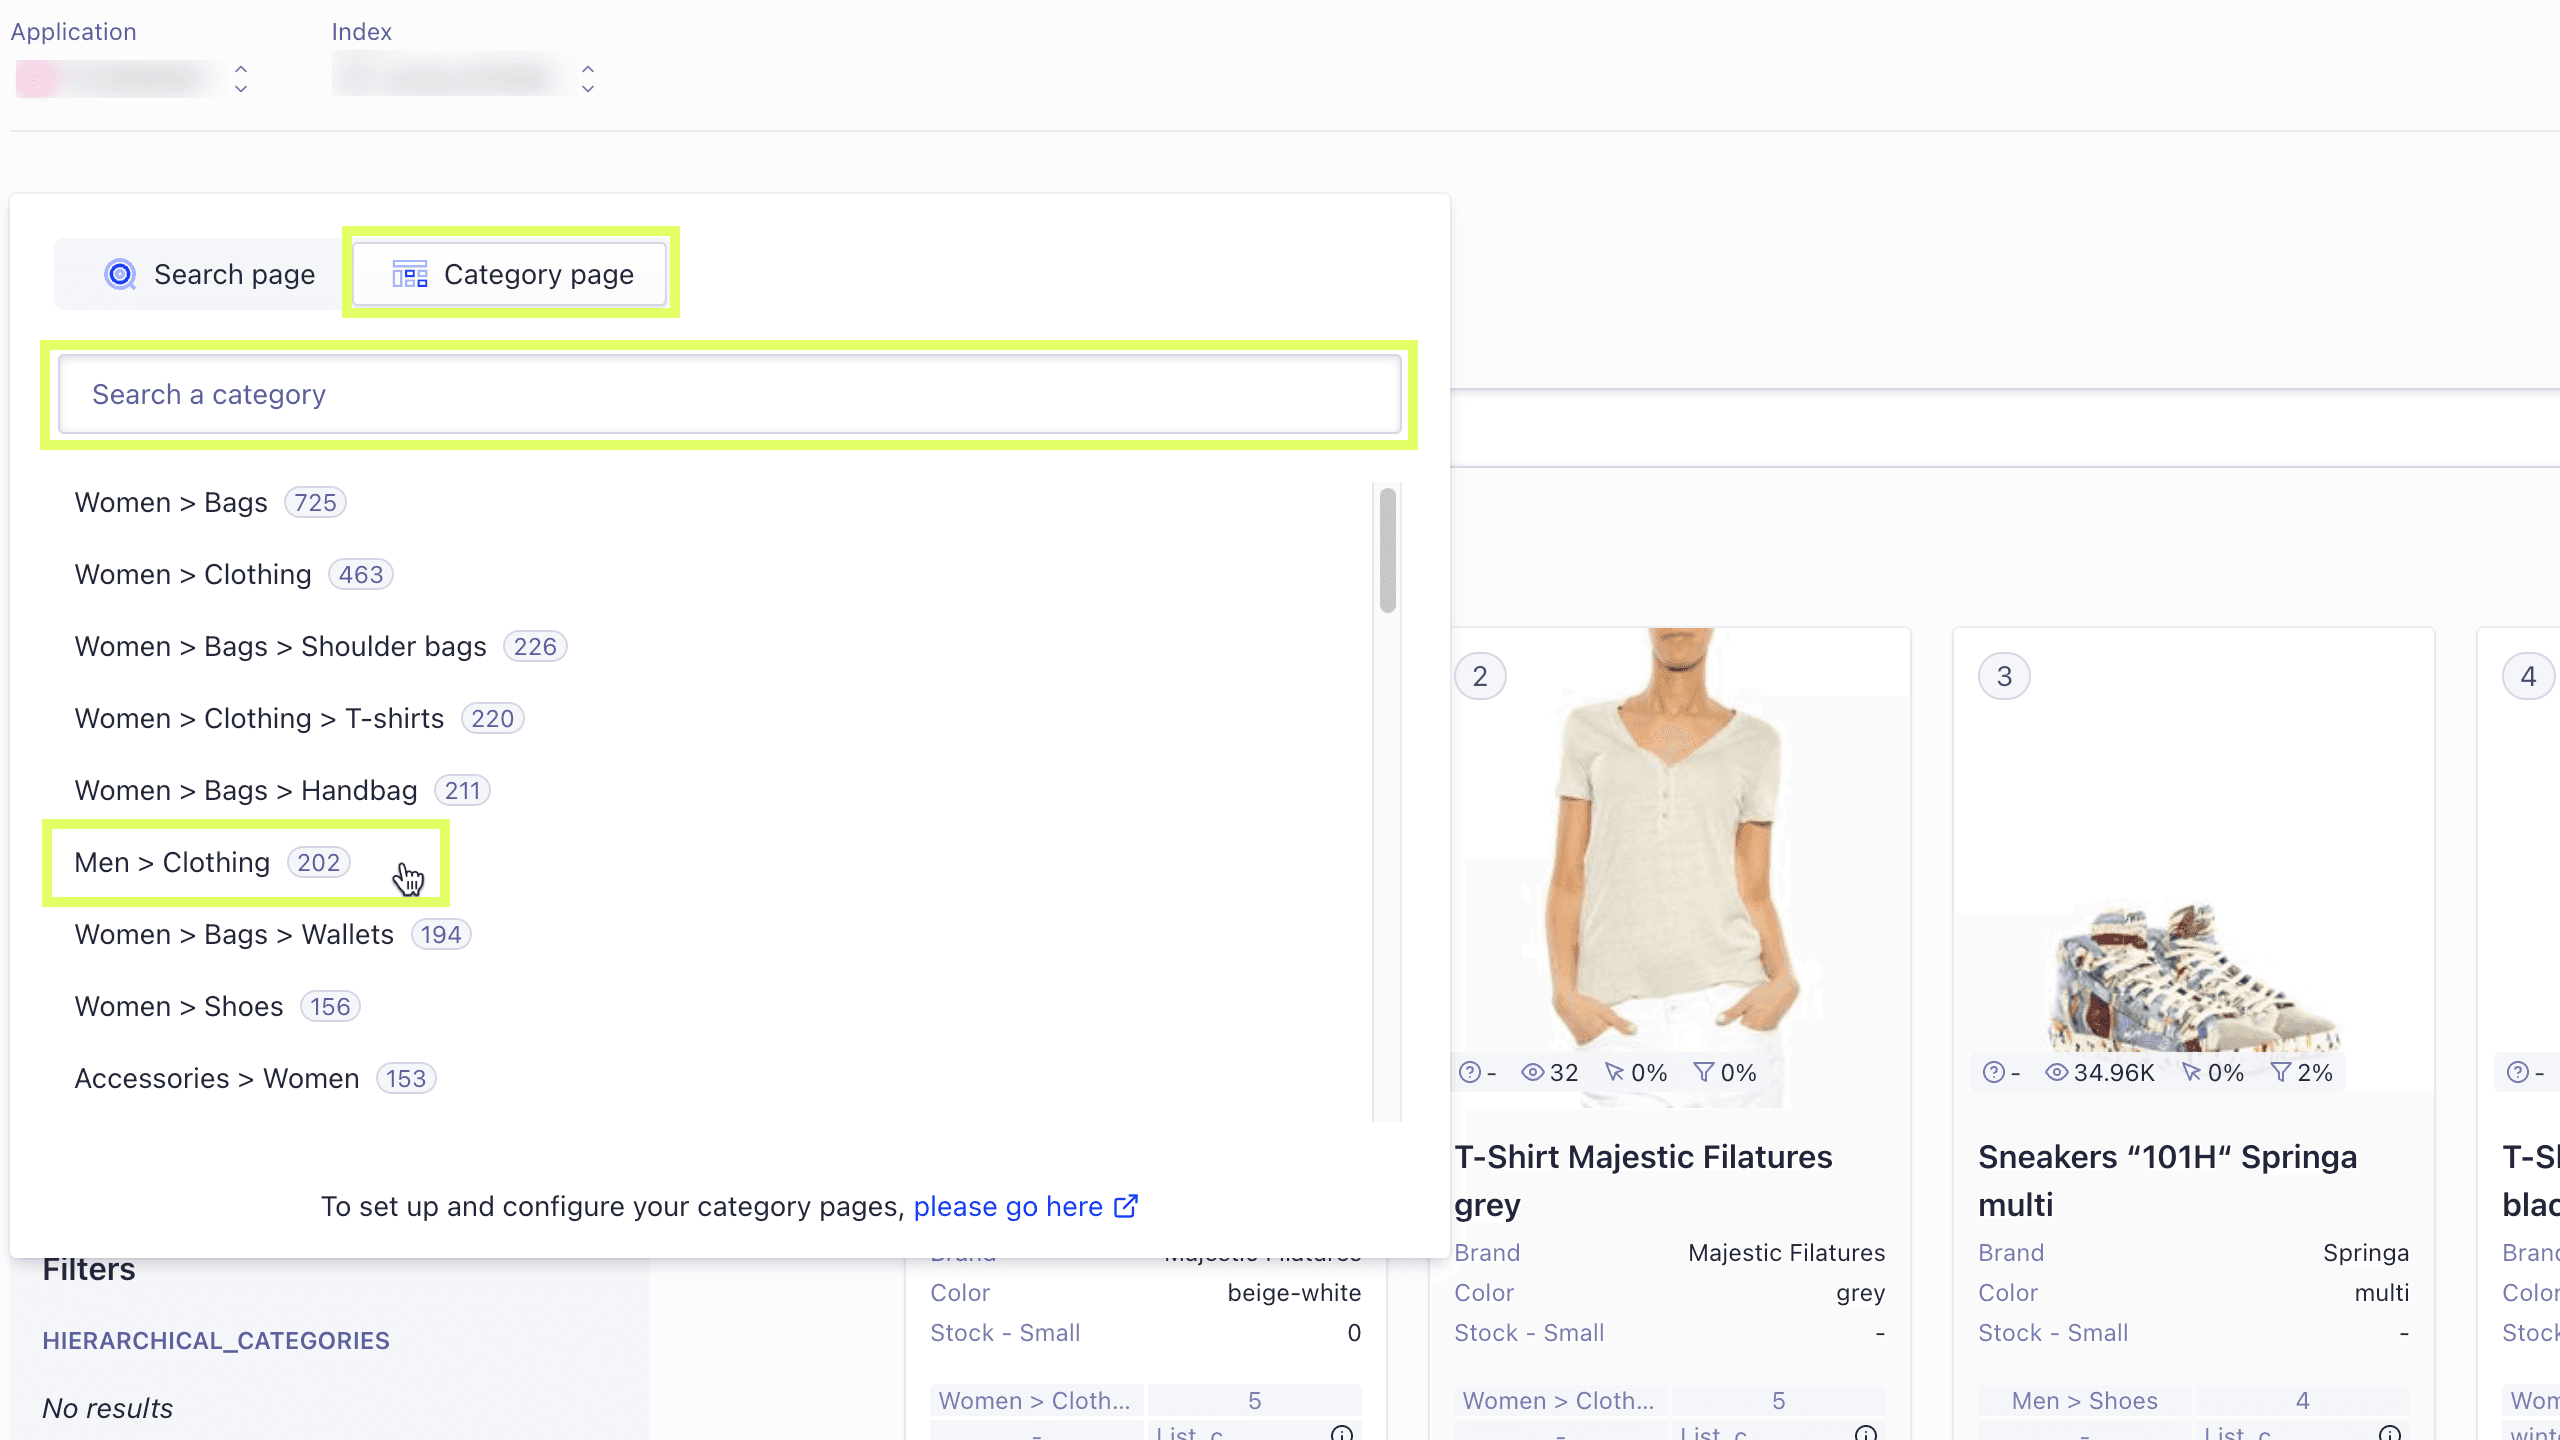
Using the Experience selector, click "Category page" and choose which category you would like to create a rule for.
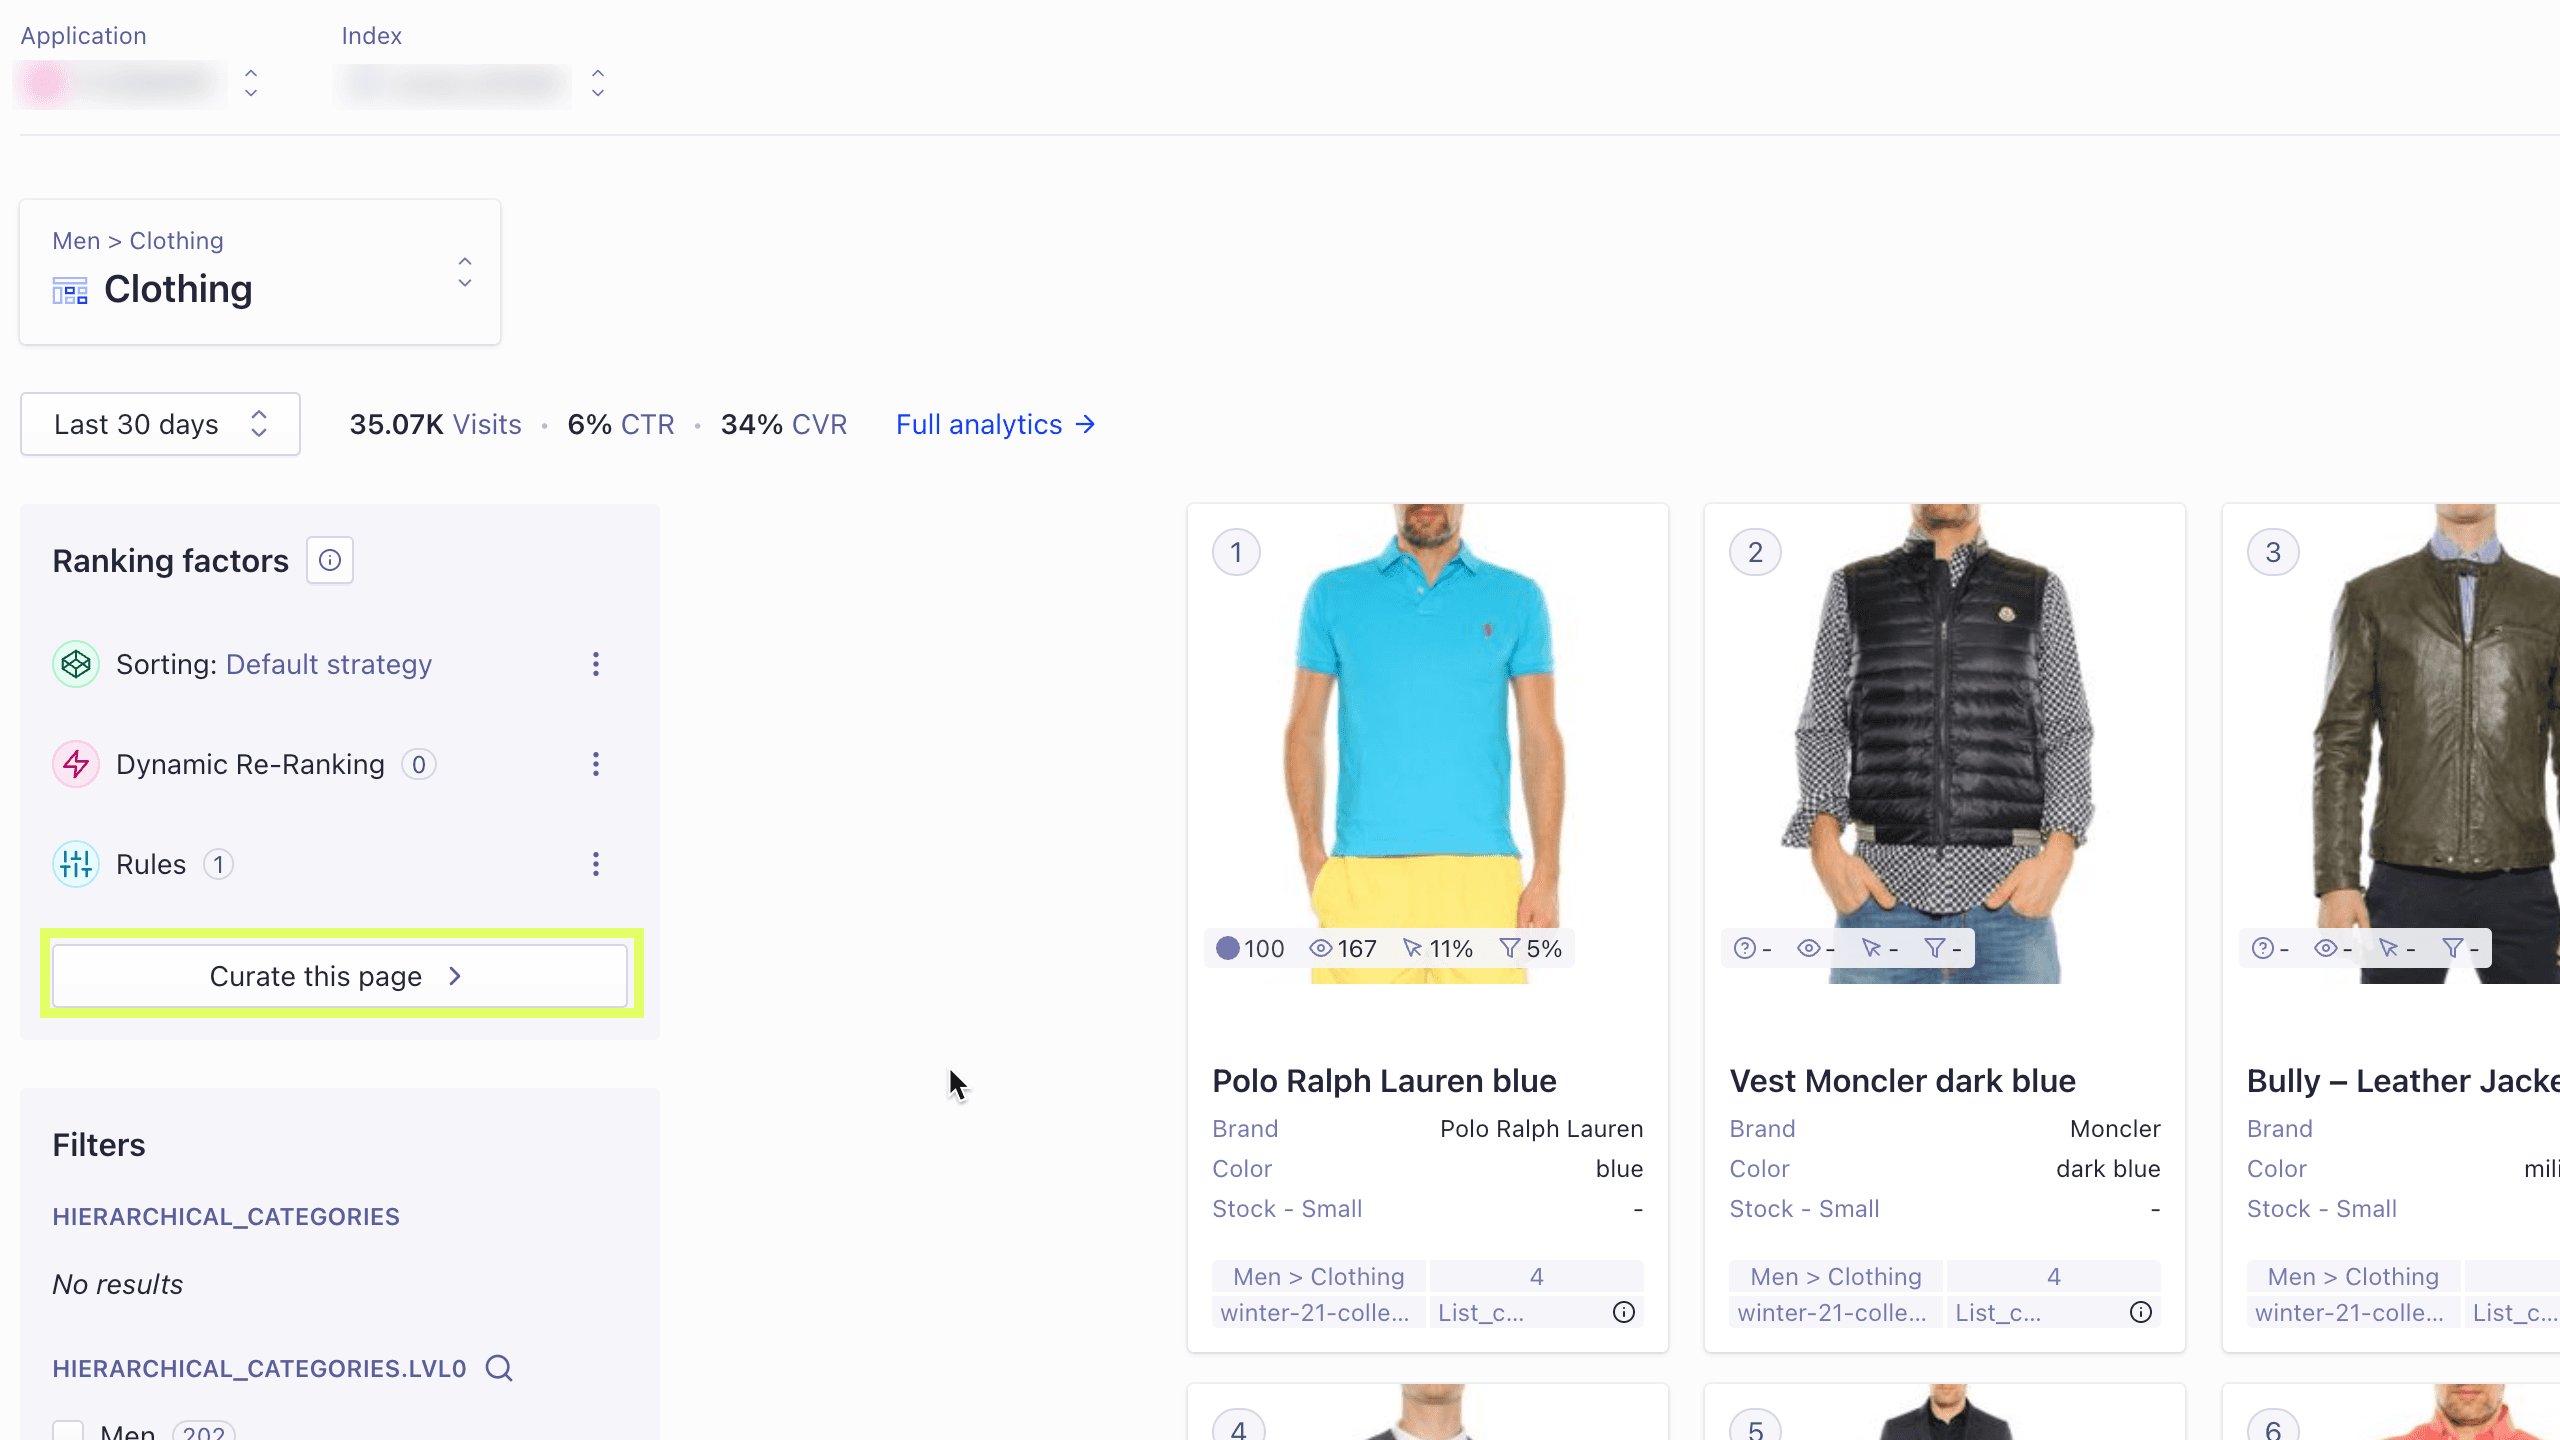
In the "Ranking factors" section, click "Curate this page".
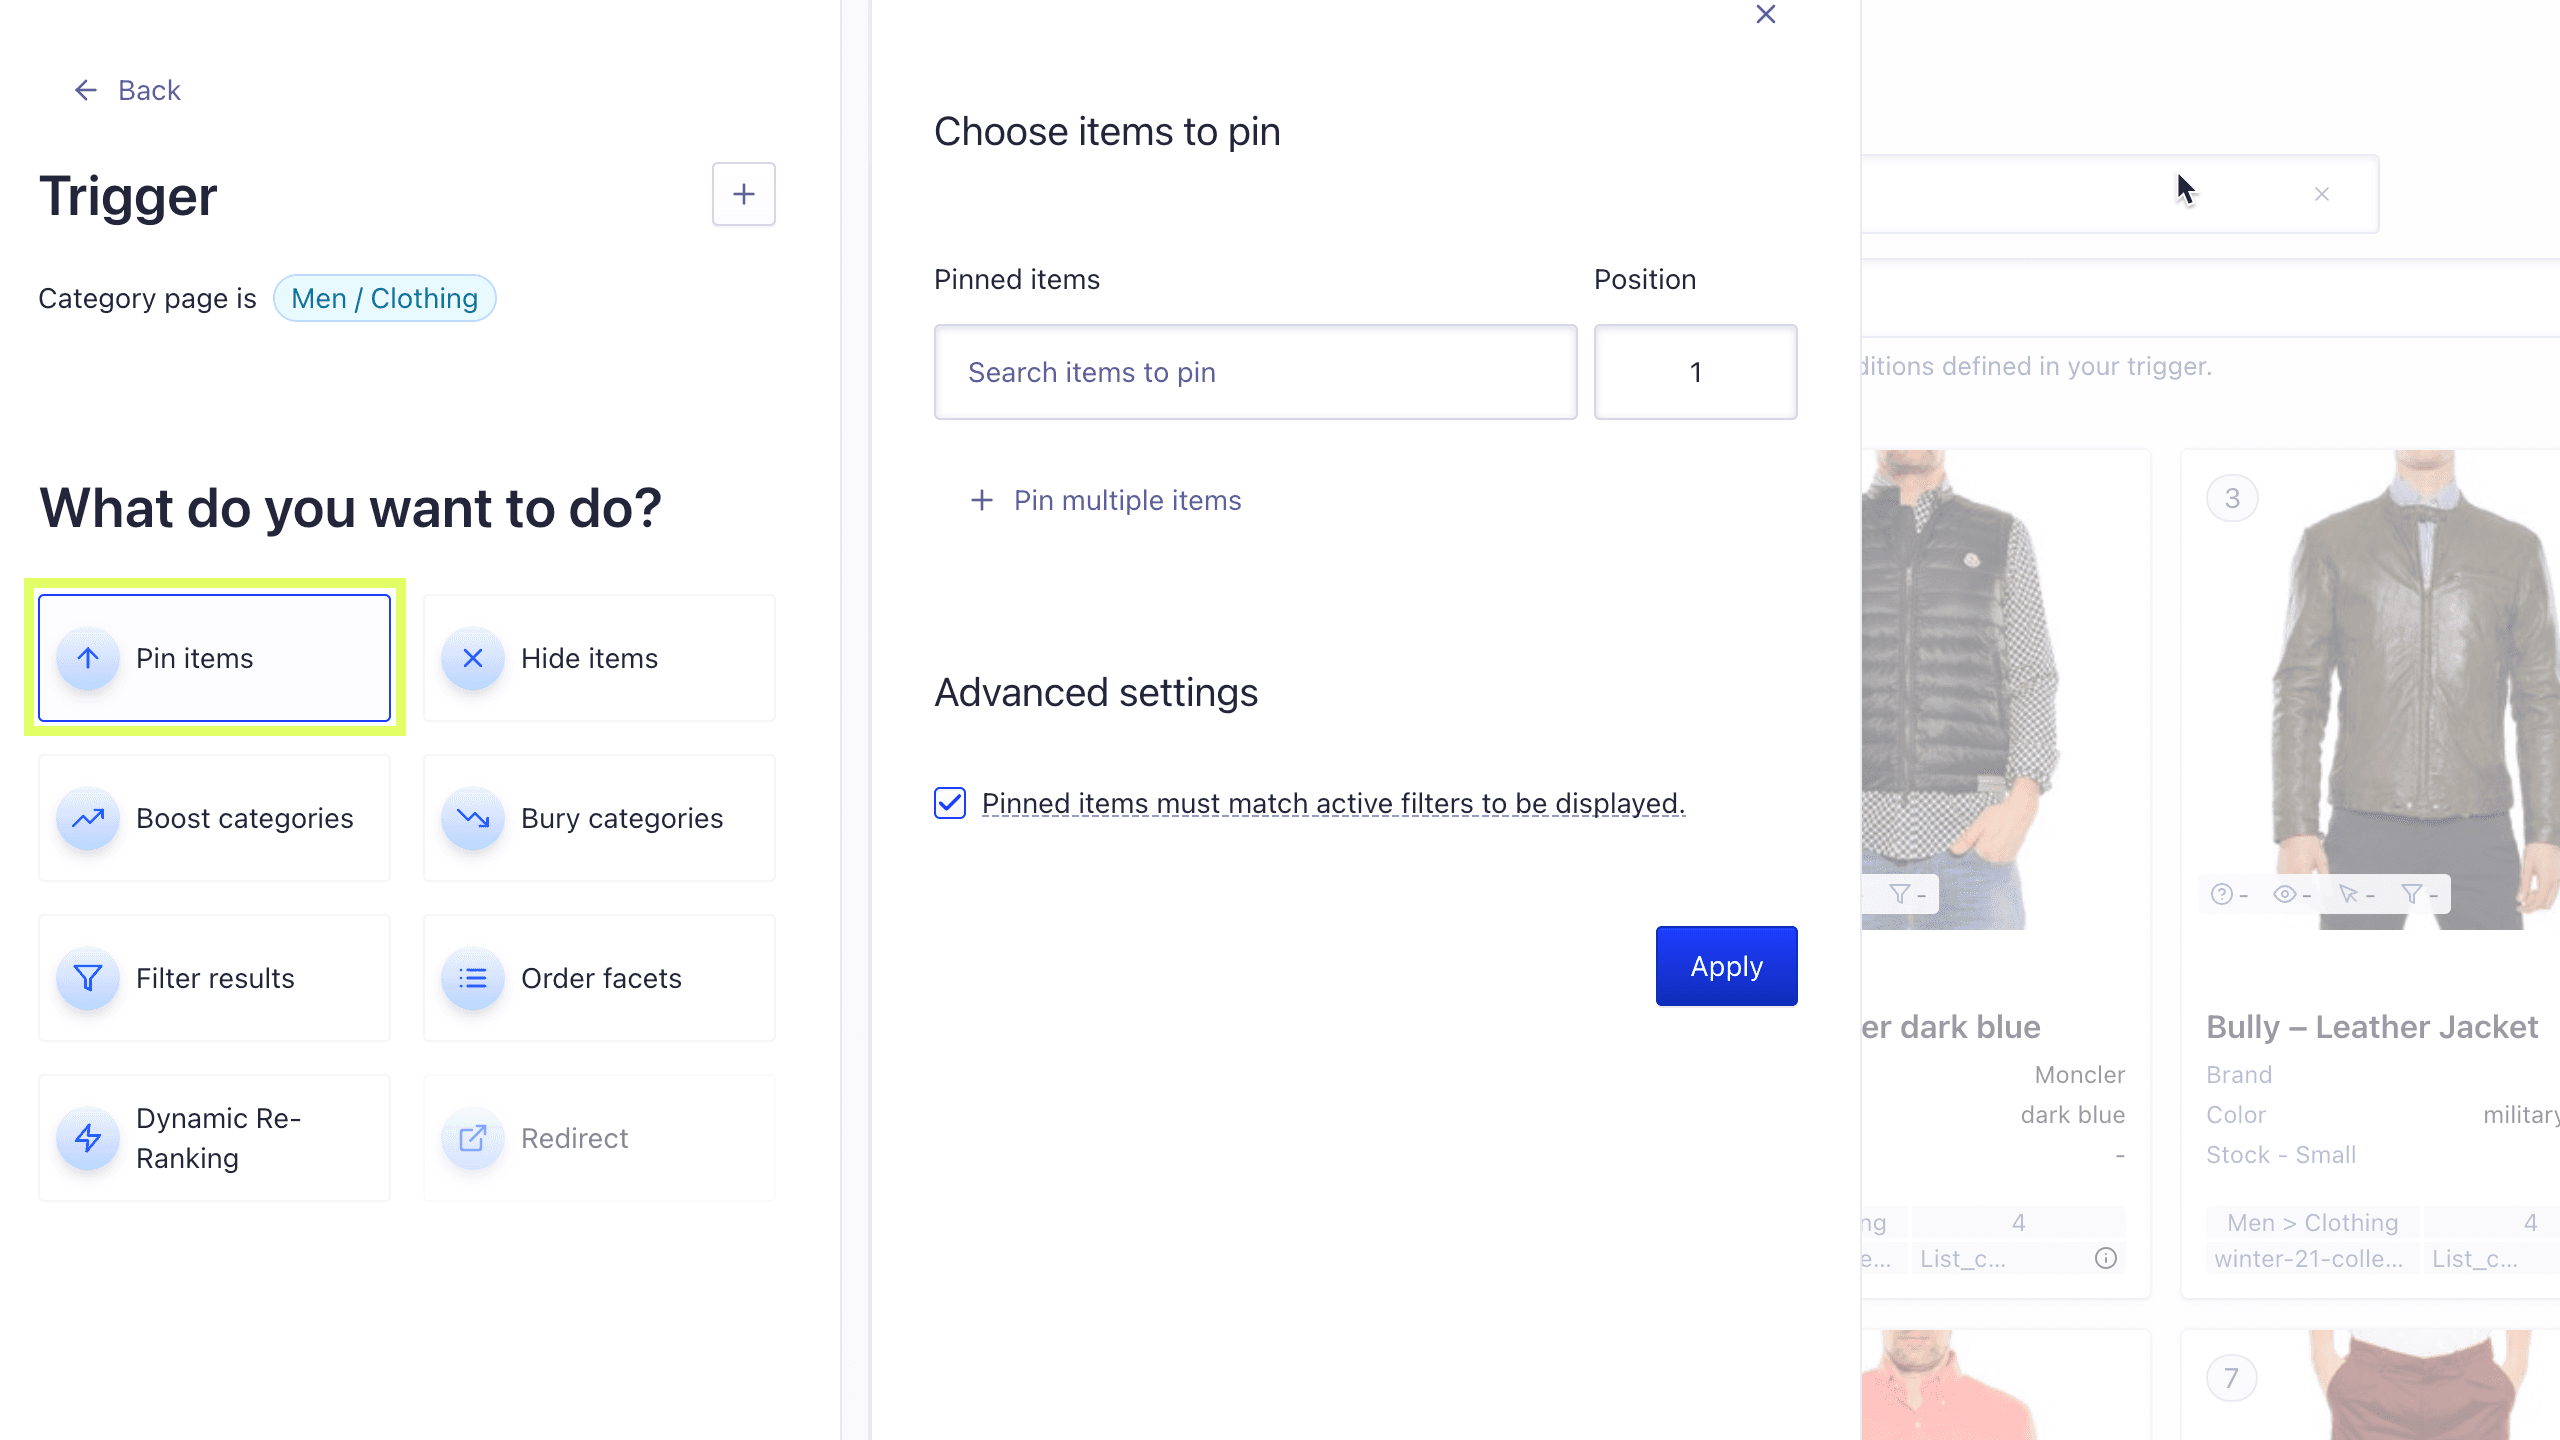
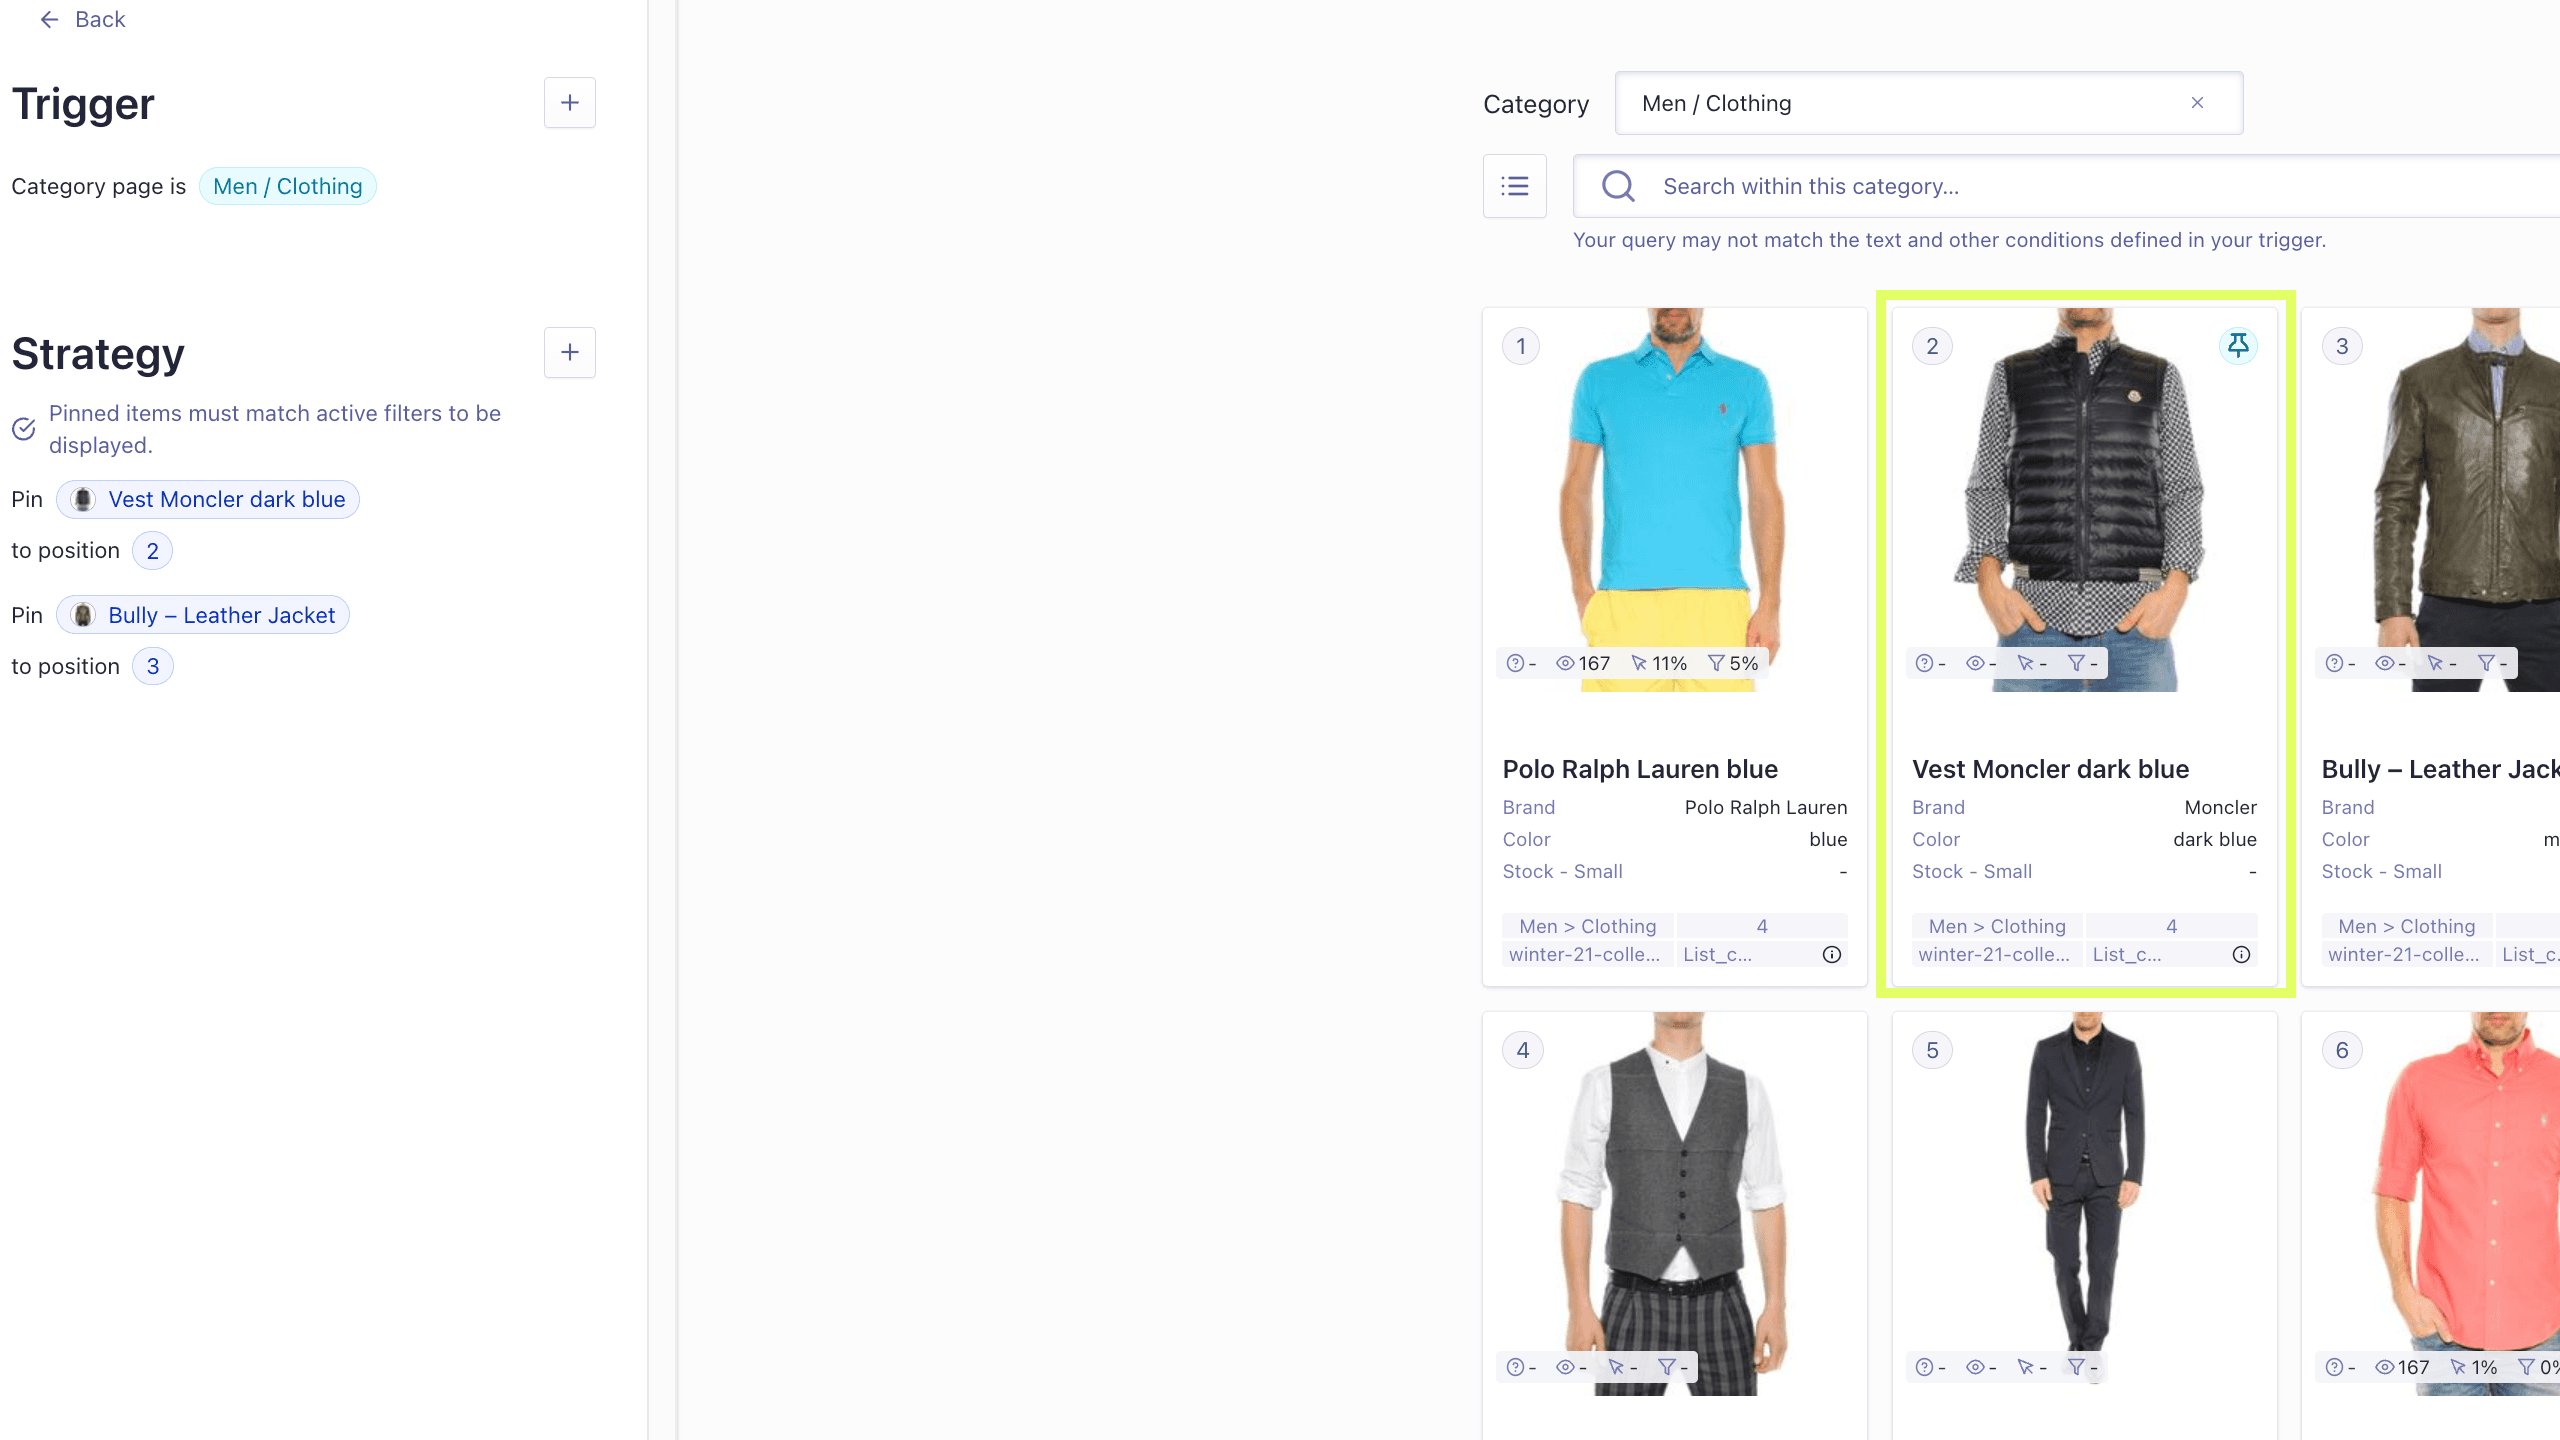
In the section What do you want to do?, select one or more actions as a consequence of applying your Rule: pin items, hide items, boost categories, bury categories, filter results, order facets, turn on Dynamic Re-Ranking, and/or set up a redirect. For this example, let's pin the Moncler Vest in dark blue in position #2.
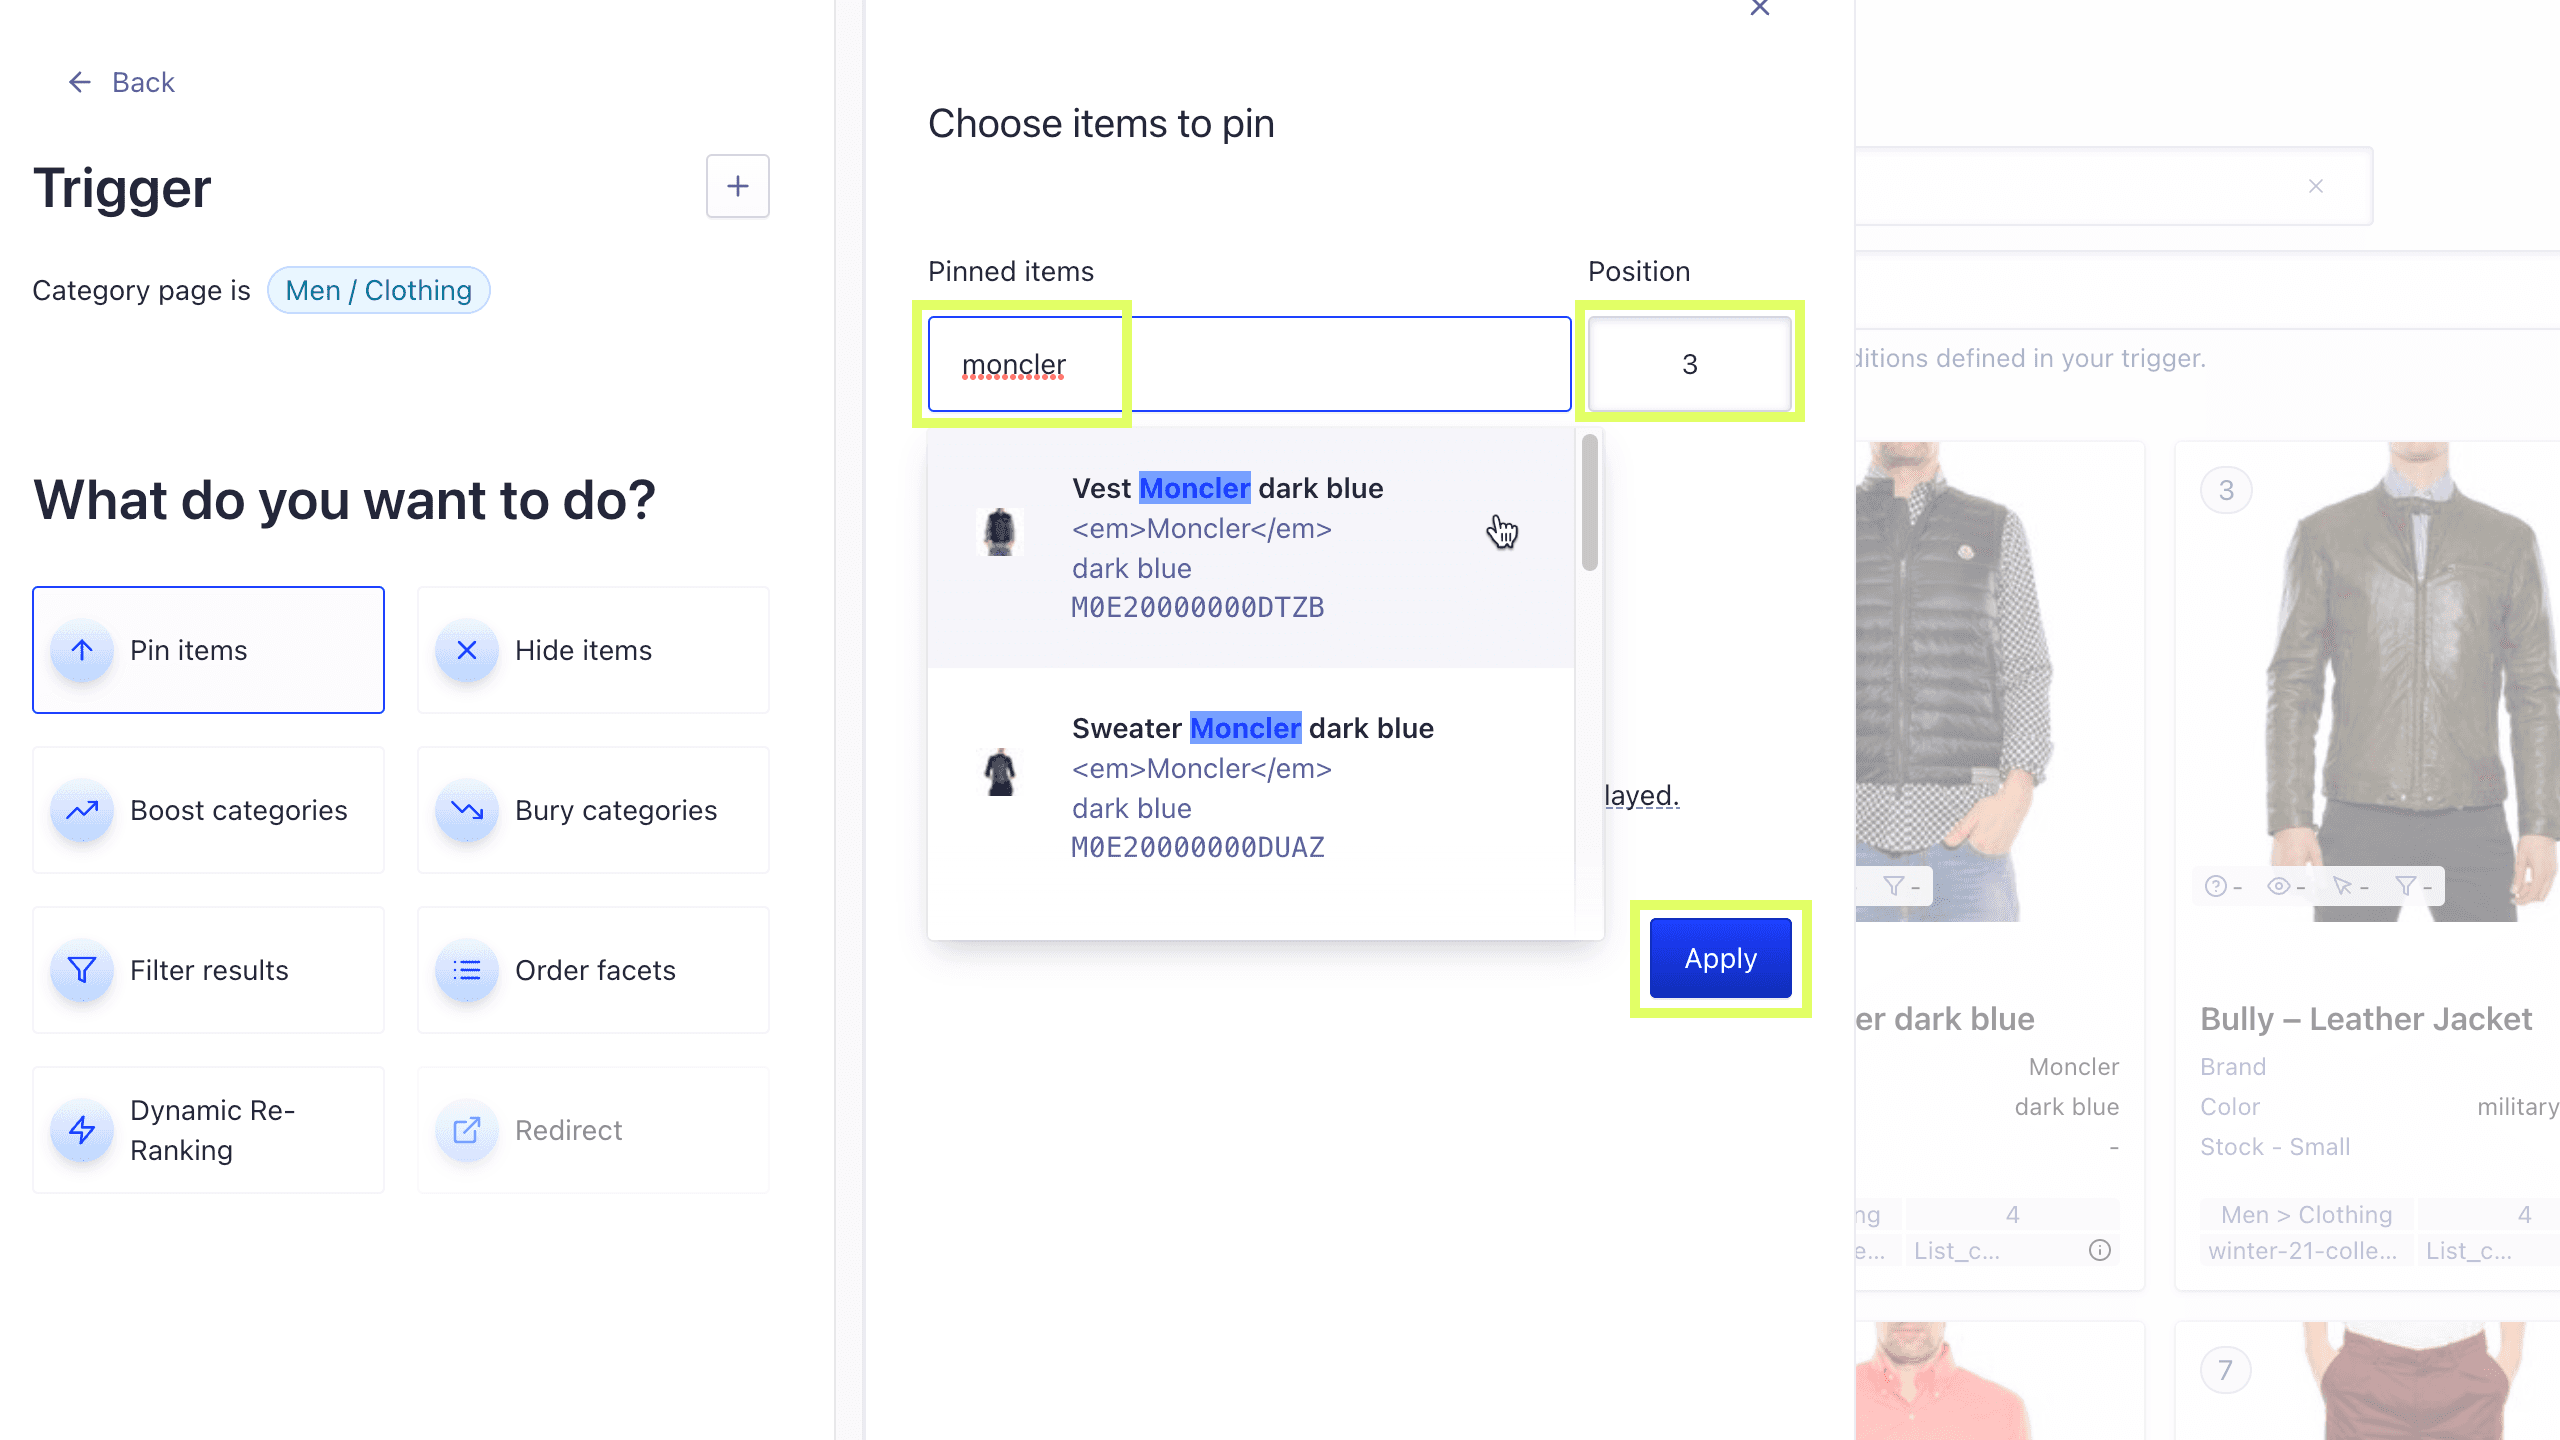
Click "Pin items".
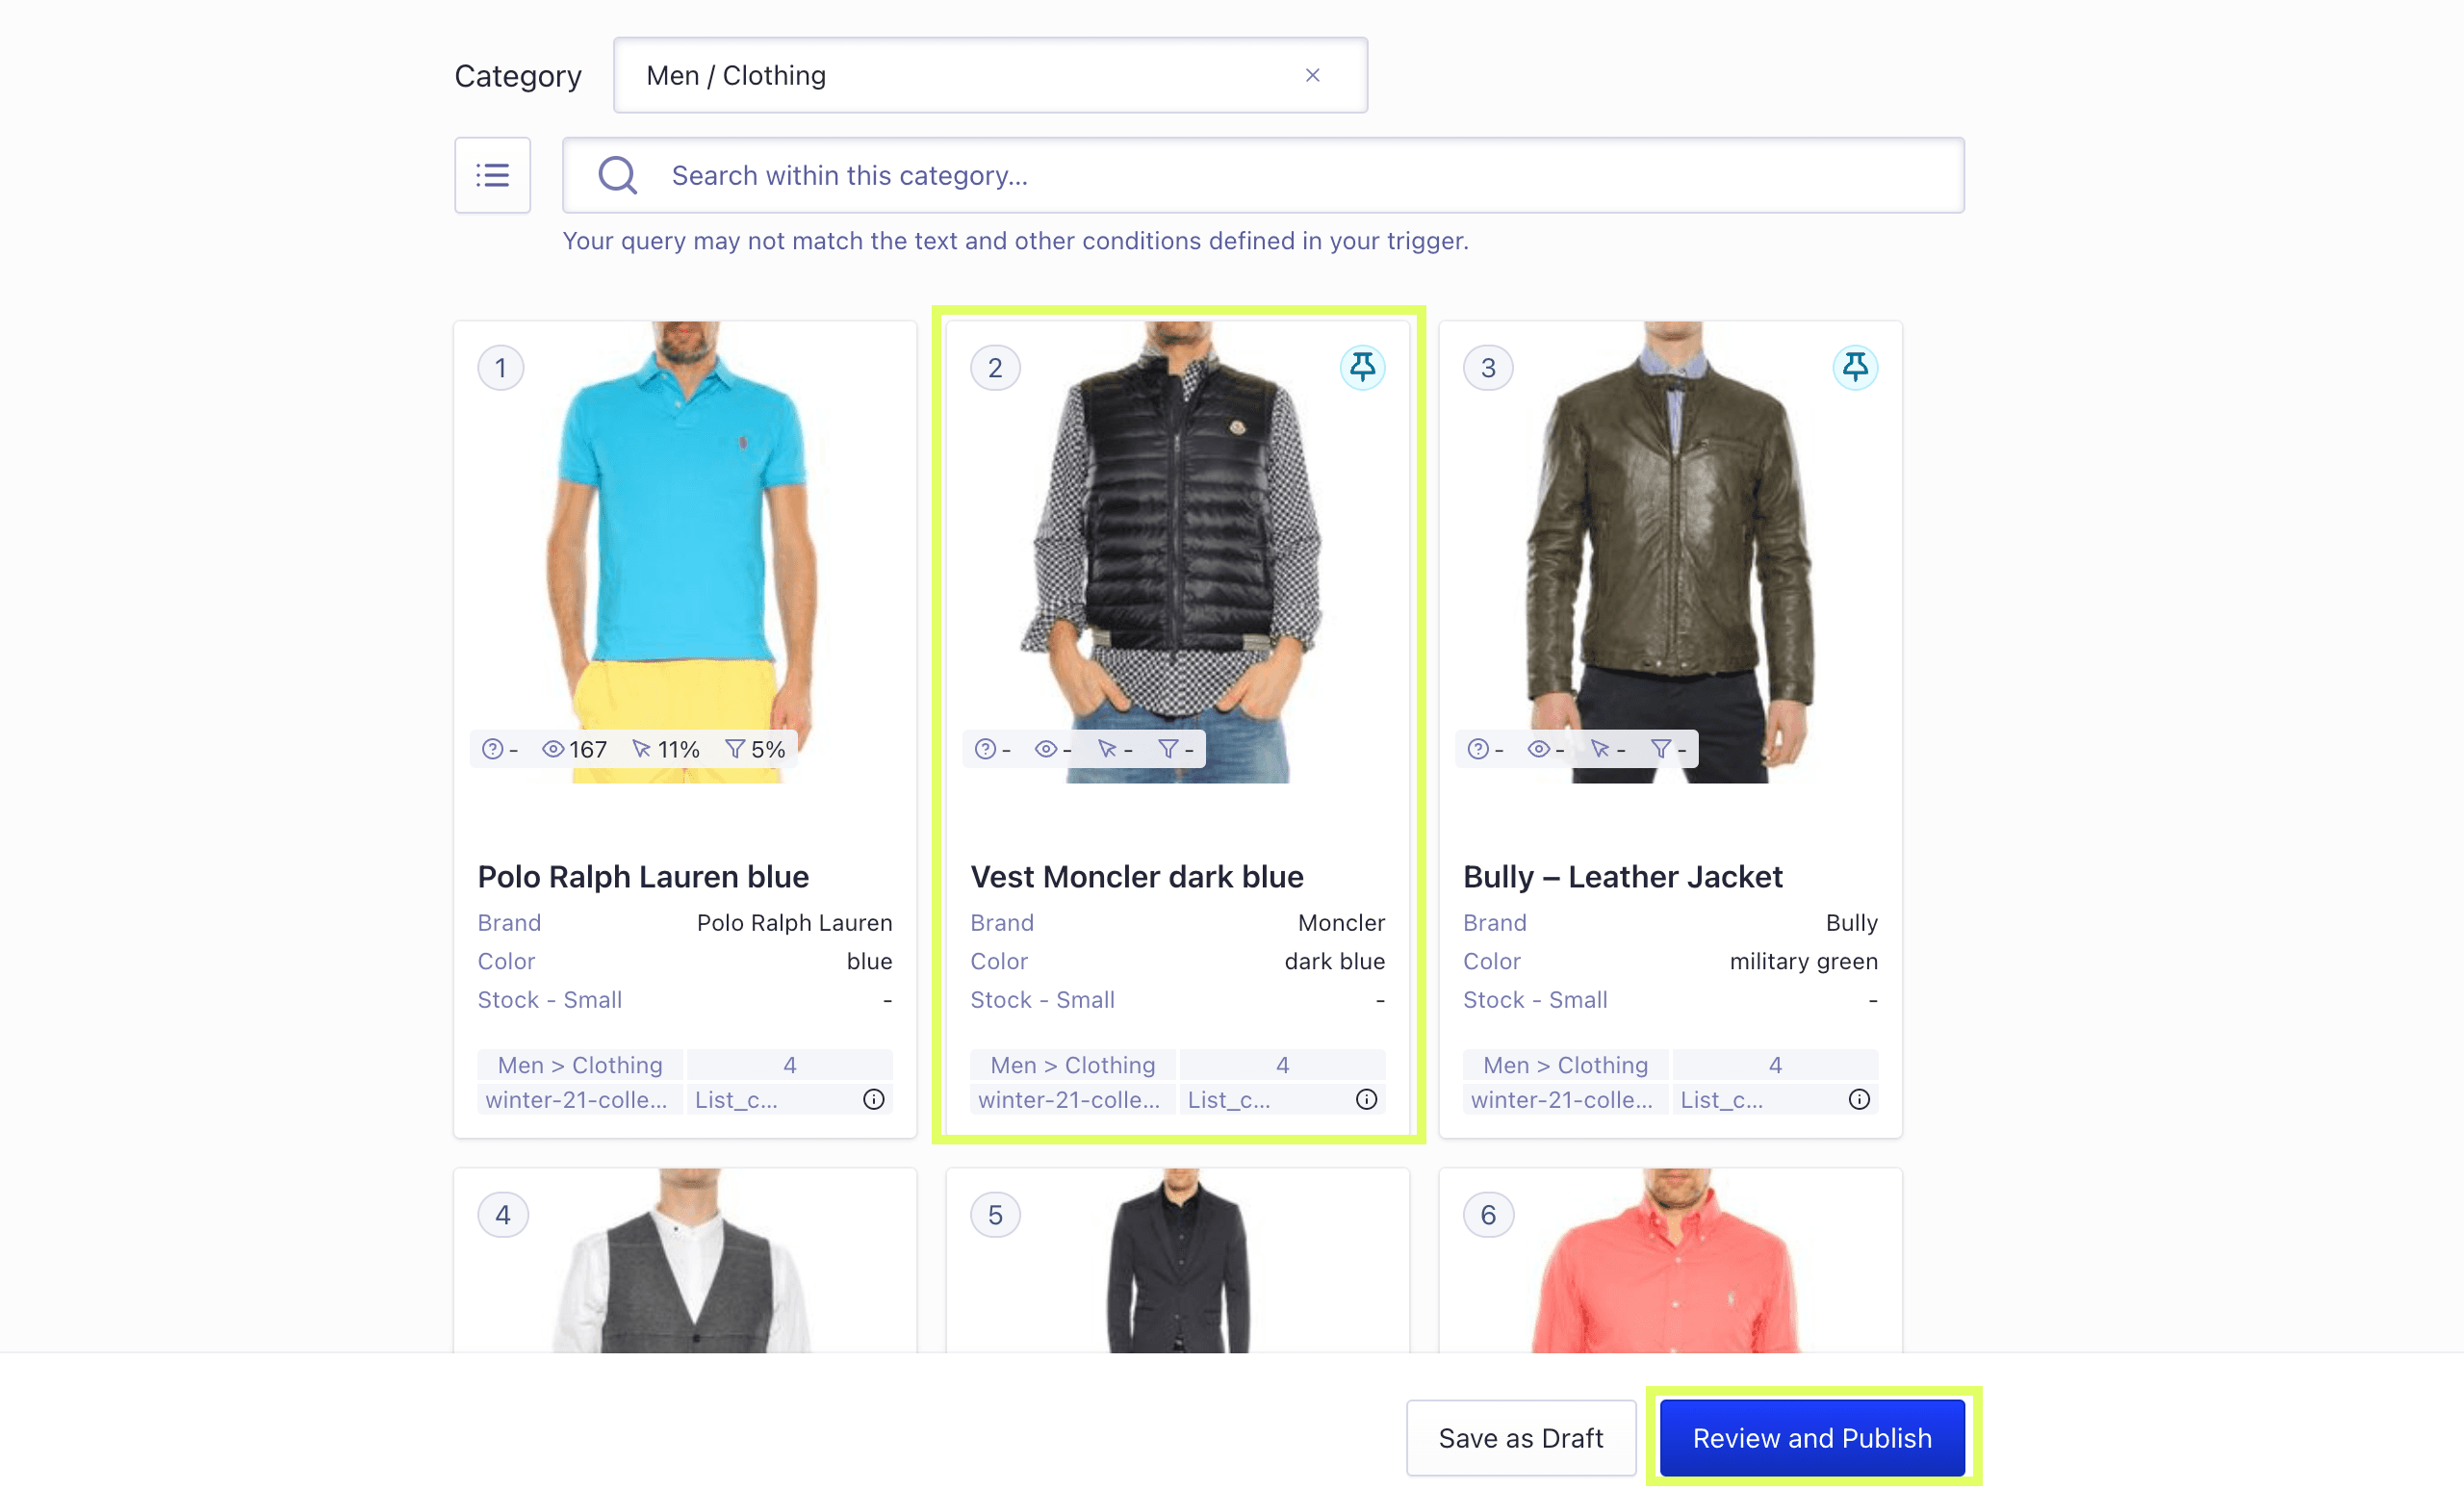
Review your changes in the simulator. You have the option of either saving your new pin rule as a draft to publish later, or you can click "Review and Publish" to publish now as a running change.
Clicking "Review and Publish" will serve an overlay where you can double-check your trigger (the category page we're updating), add an optional - but highly encouraged - rule description, and the strategy/consequence (the item pinned to what position).
SuperUser Tip: If you already have a product in mind you’d like to pin, simply search for the item name in the Pinned items search field, select it from the live result list, and update the Position field to the placement you’d like to pin the item to (in our example, position #2).
You can use both the Visual Editor and the Manual Editor in the dashboard.
The Visual Editor has a configurable preview that lets you test the effect of your Rules on your index before you activate a Rule in production. On the other hand, the Manual Editor supports more advanced ways to set up Rules. The following table provides an overview of their capabilities to help you decide when you should use which.
When to use the Visual Editor:
When to use the Manual Editor:
To merchandise categories with the Visual Editor, follow these steps:
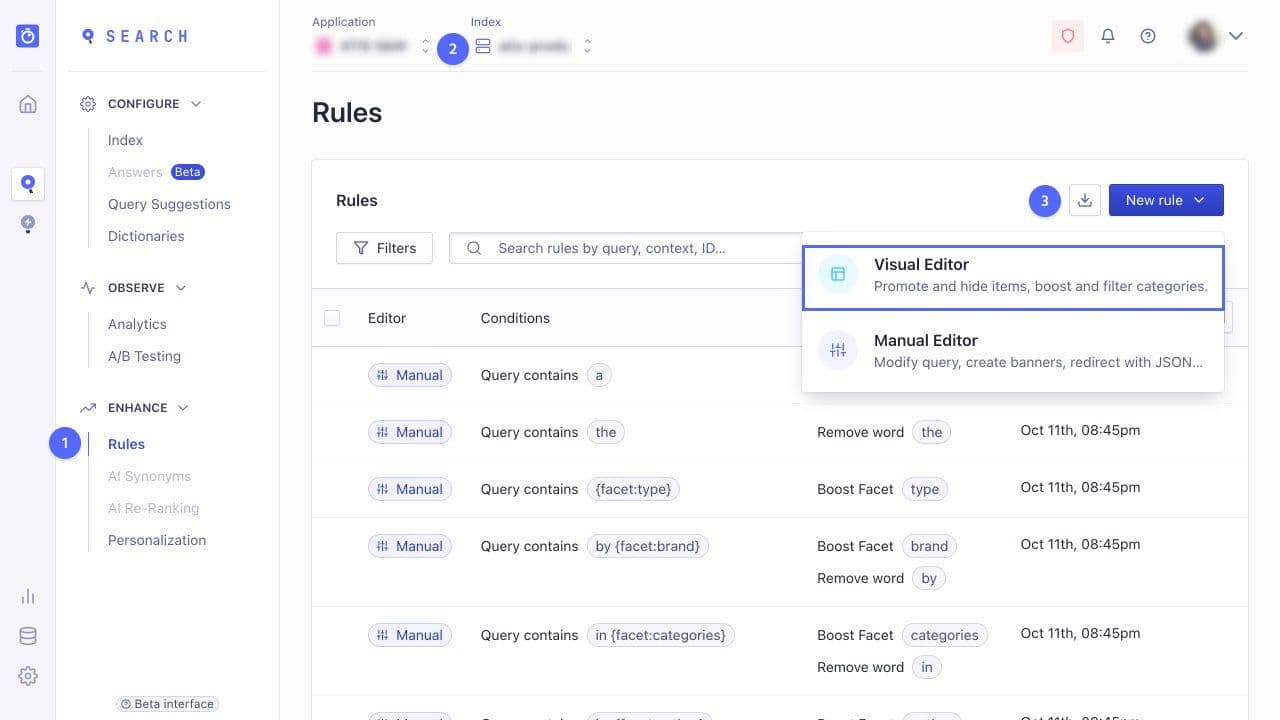
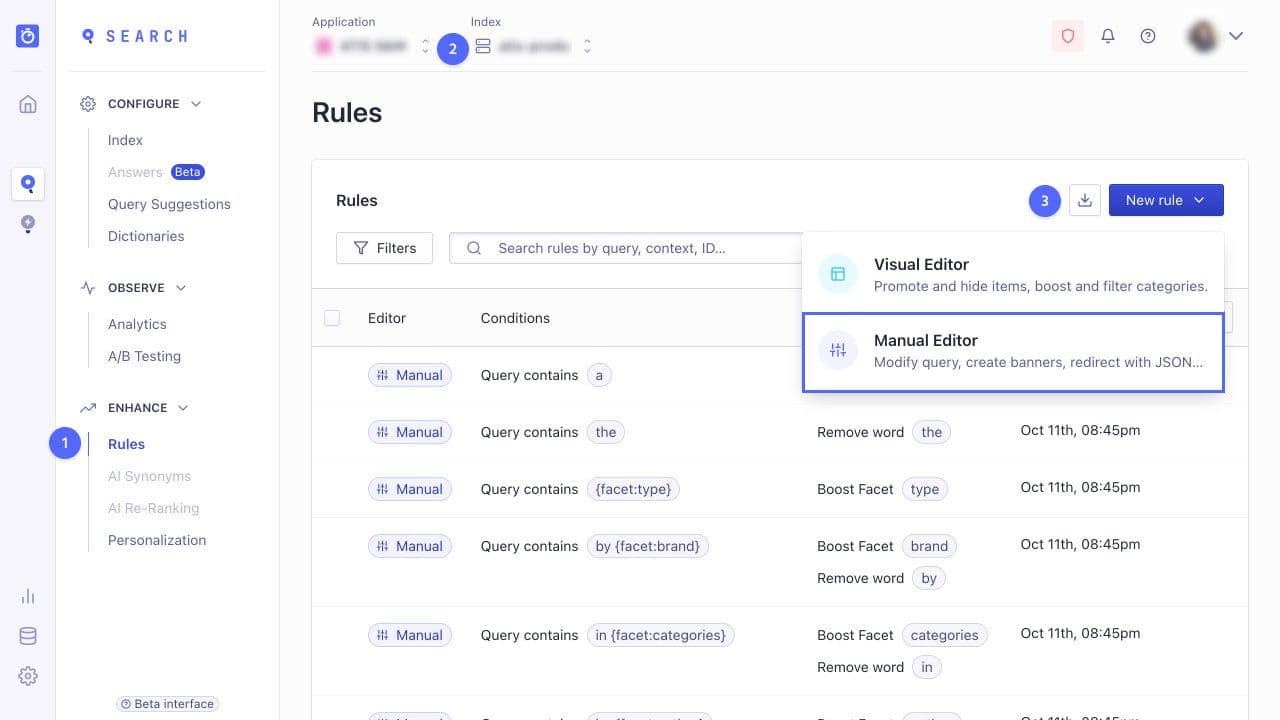
Go to the Rules section of the Algolia dashboard.
Select the index to which you want to add Rules.
Click New Rule and select Visual Editor.
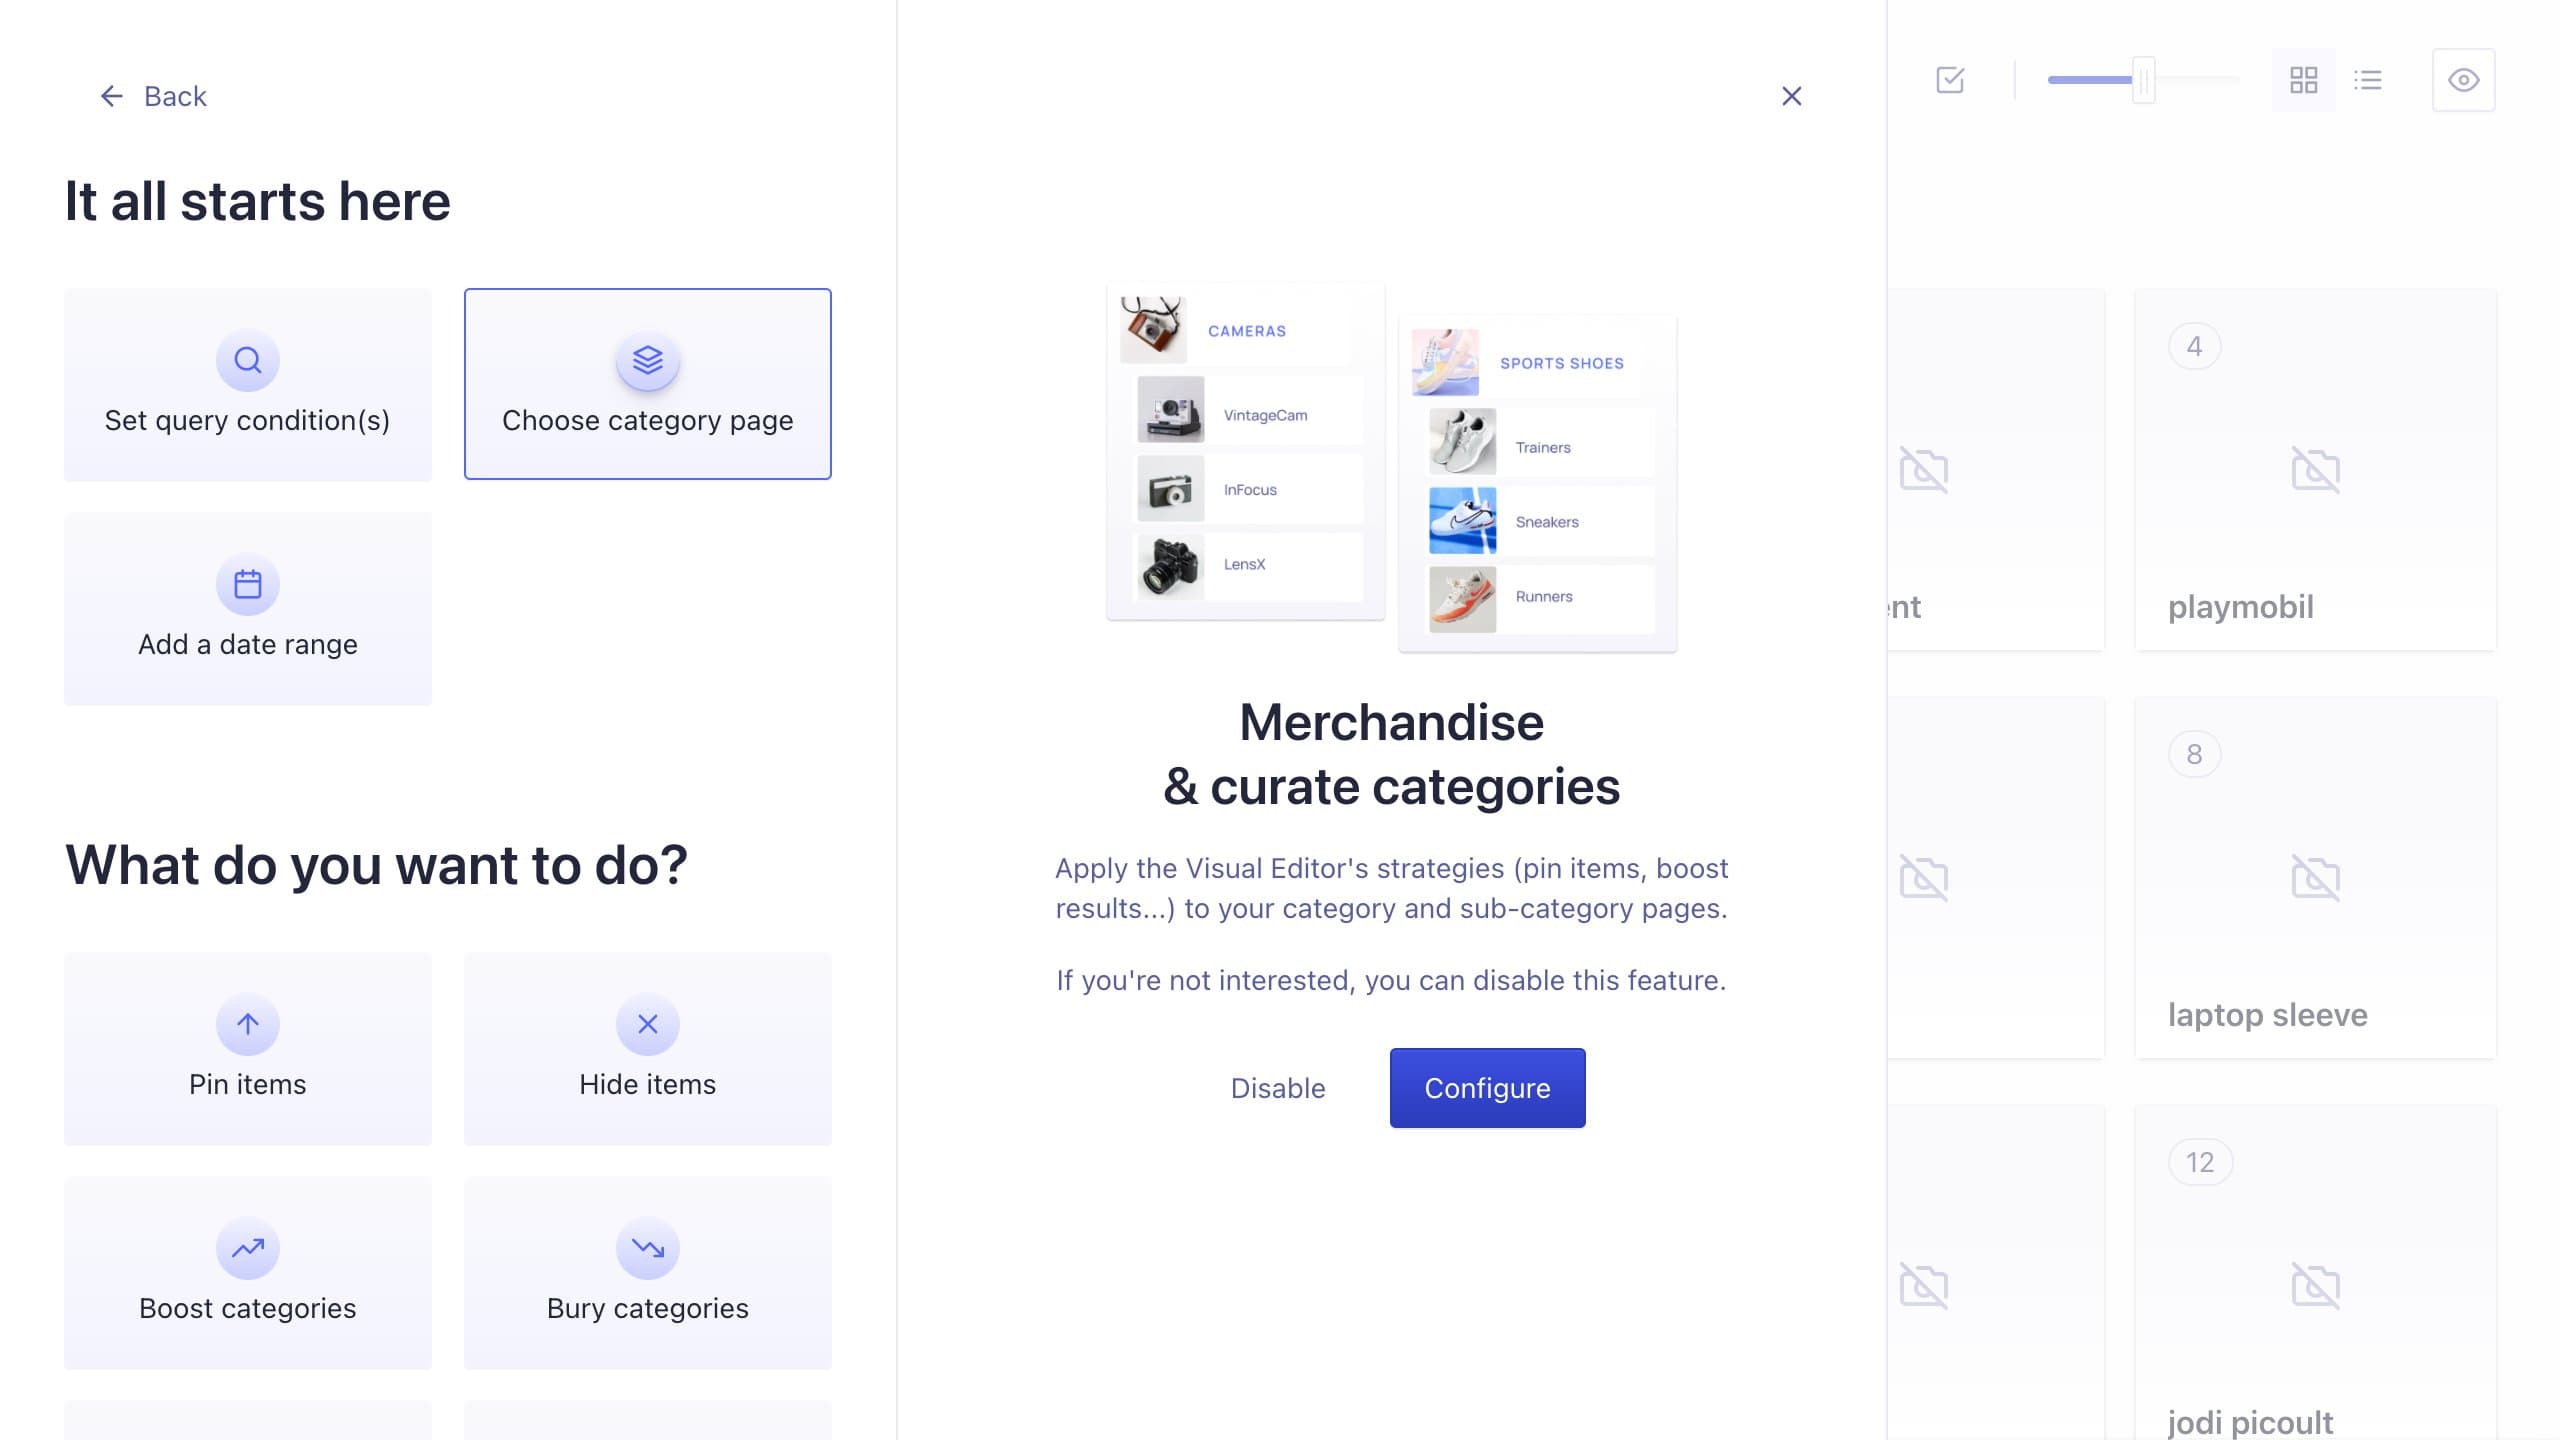
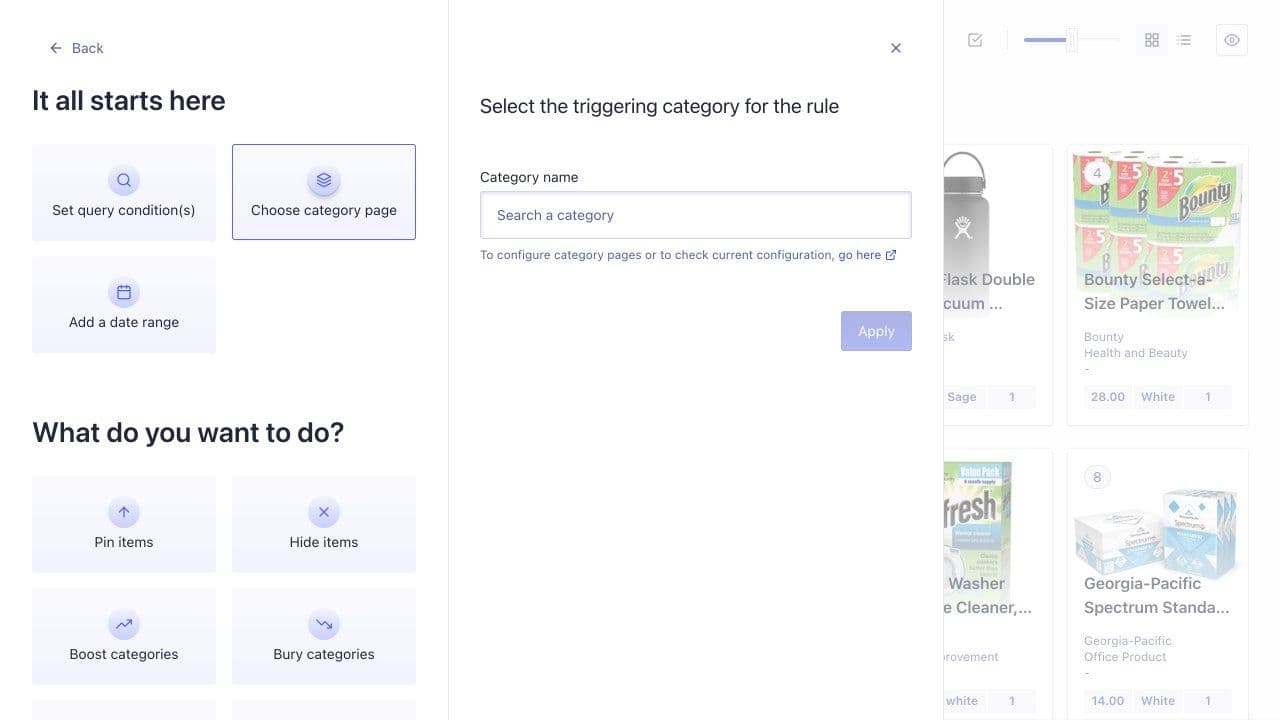
In the It all starts here section, select Choose category page and click Configure.
Set up your display preferences. See Merchandising category pages for more information.
Select the name of the category page and apply a merchandising Rule to it. Define the condition (when the Rule should apply) and one or more consequences (the Rule’s effect).
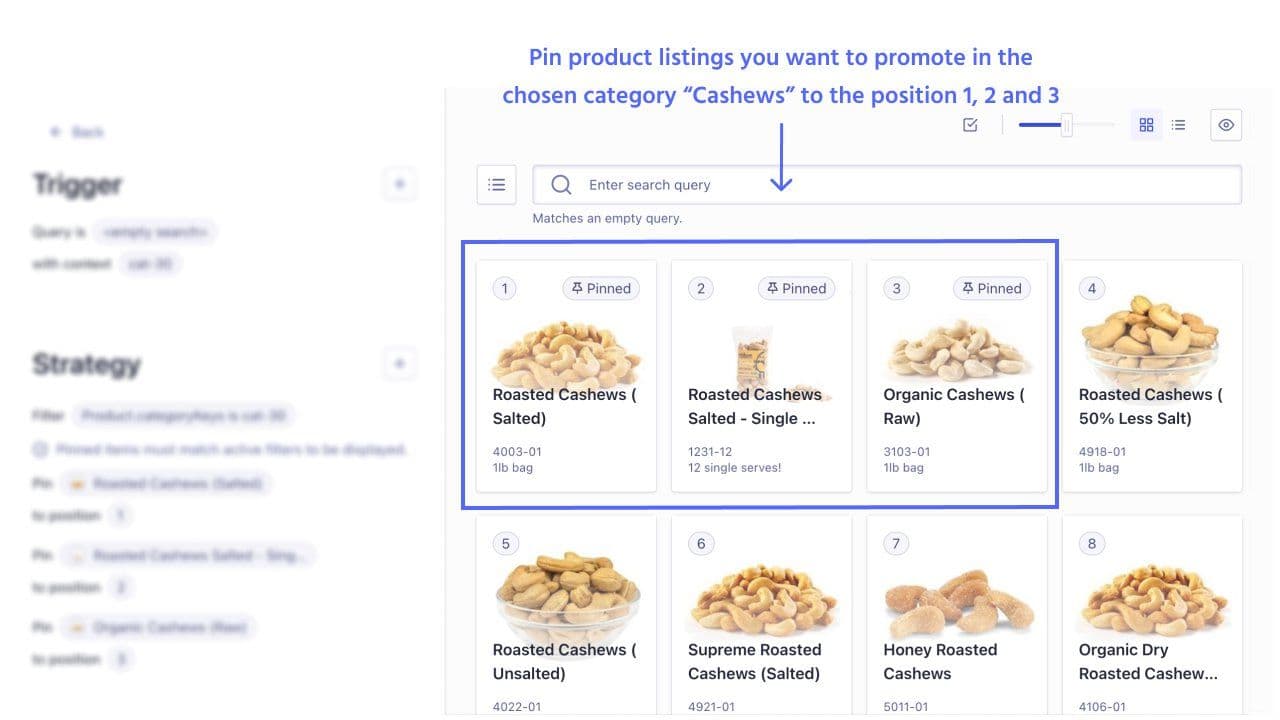
Preview the effect of the new Rule in the Visual Editor.
In the example, selected products from the category “Cashews” are pinned to positions 1, 2, and 3.
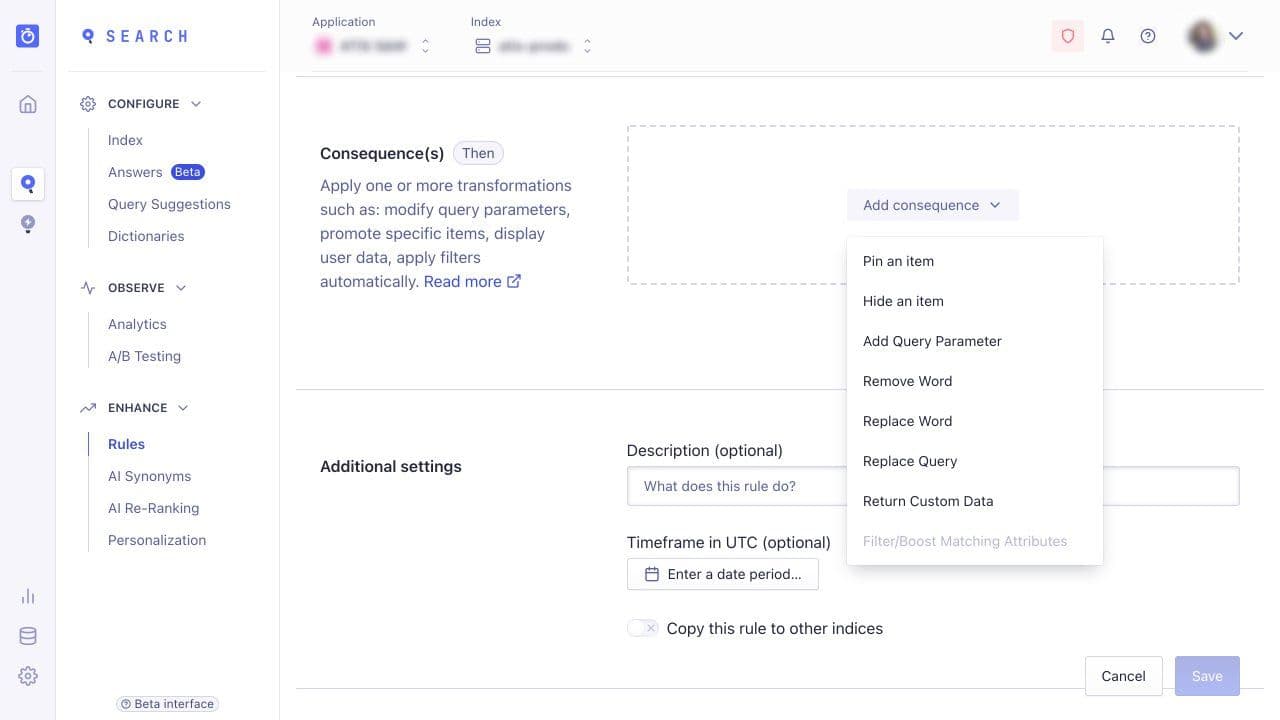
To merchandise categories with the Manual Editor, follow these steps:
1. Go to the Rules section of the Algolia dashboard.
2. Select the index to which you want to add Rules.
3. Click New Rule and select Manual Editor.
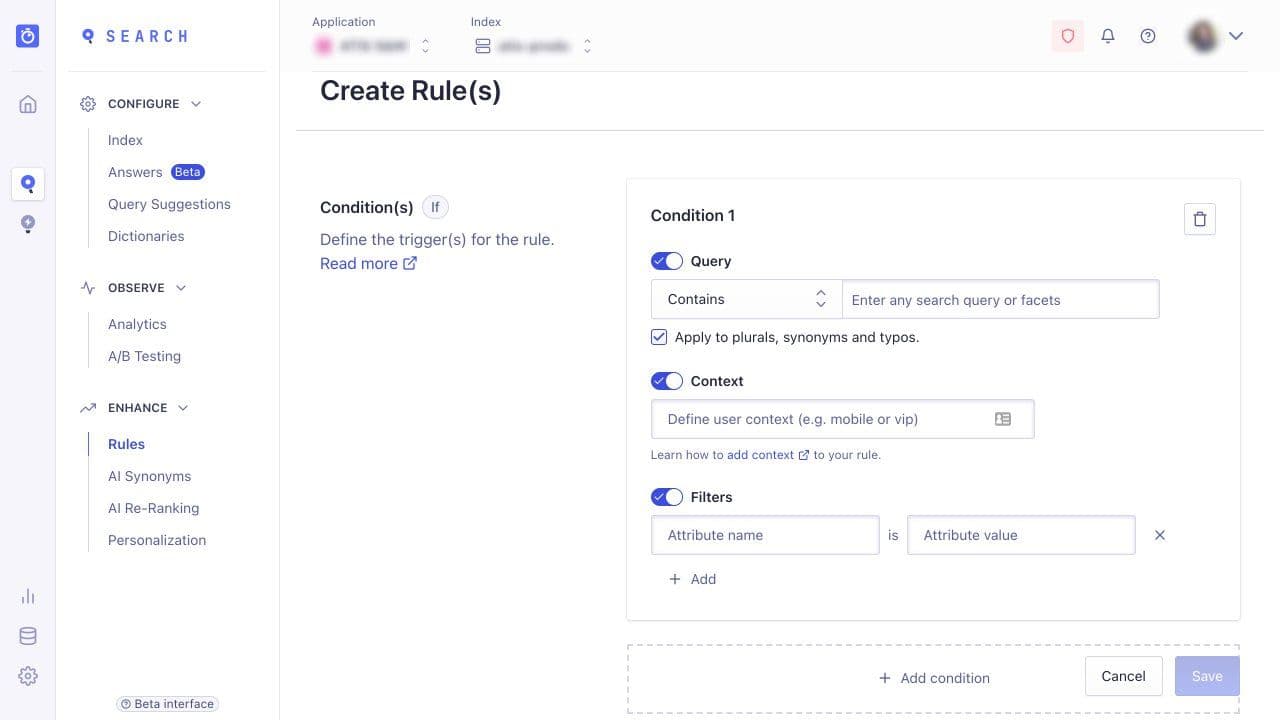
4. Create a new Rule:
Define the condition:
Set Query to empty (users didn’t search for anything but browsed a category page).
Set Context to the category you want the Rule to affect.
Optional: set up a specific filter for the chosen category page
5. Define the consequences. For example, redirect users selecting a sci-fi book category to a promotional landing page for this category using the Return custom data option. Alternatively, users selecting the same category see the book “Dune” featured at the top of the page using the Pin an item option.