In our Algolia DevBit session, we built a complete search experience for a Supabase-backed app in under 10 minutes: from indexing data from your Supabase Postgres table to implementing a streamlined search experience. The goal was simple: show how quickly you can add fast, typo-tolerant search to a Supabase project using:
We’ll walk through the exact flow we demoed, using our little side project: Brews for You, a Next.js app for finding great craft beer nearby.
What we’re building: “Brews for You”
We wanted a small, relatable app that makes the “why” of search obvious. We both love craft beer (and winter ales season gives you plenty to browse), so we built a web app that:
- lists beers and their breweries
- lets you open a beer details page
- needs search badly (because scrolling 1,800+ beers and breweries is not a strategy)
At the start of the demo, the app had no search experience. By the end, it had a polished dropdown search UI, fully styled to match the site.
Why Supabase + Algolia works well
Supabase is an open source backend platform built on Postgres. If you already know Postgres, you can move fast: tables, views, auth, storage, realtime features, the works.
Algolia isn’t a database—it’s the search layer. So the pattern is:
- Keep your source of truth in Supabase (Postgres)
- Sync the data you want searchable into Algolia
- Build an interface that feels instant, typo-tolerant, and “native” to your product
Step 1: model your data for search (we used a Postgres view)
In Supabase, we had two tables:
We could index them separately, but for our UI we wanted a single set of search results that already includes both beer and brewery info. So we created a Postgres view that flattens the data into the shape we want for search (we called it something like algolia_beer_search).
This is a small thing that pays off immediately: your indexing becomes simpler so you don’t need to execute two search requests across two different indices, ie, your UI doesn’t need to do any “shady” data massaging to display results.
Step 2: connect Supabase to Algolia (Data sources → Connectors)
In the Algolia dashboard, we:
- Went to Data sources
- Clicked Connectors
- Found Supabase (it had a “New” label in our demo)
- Clicked Connect
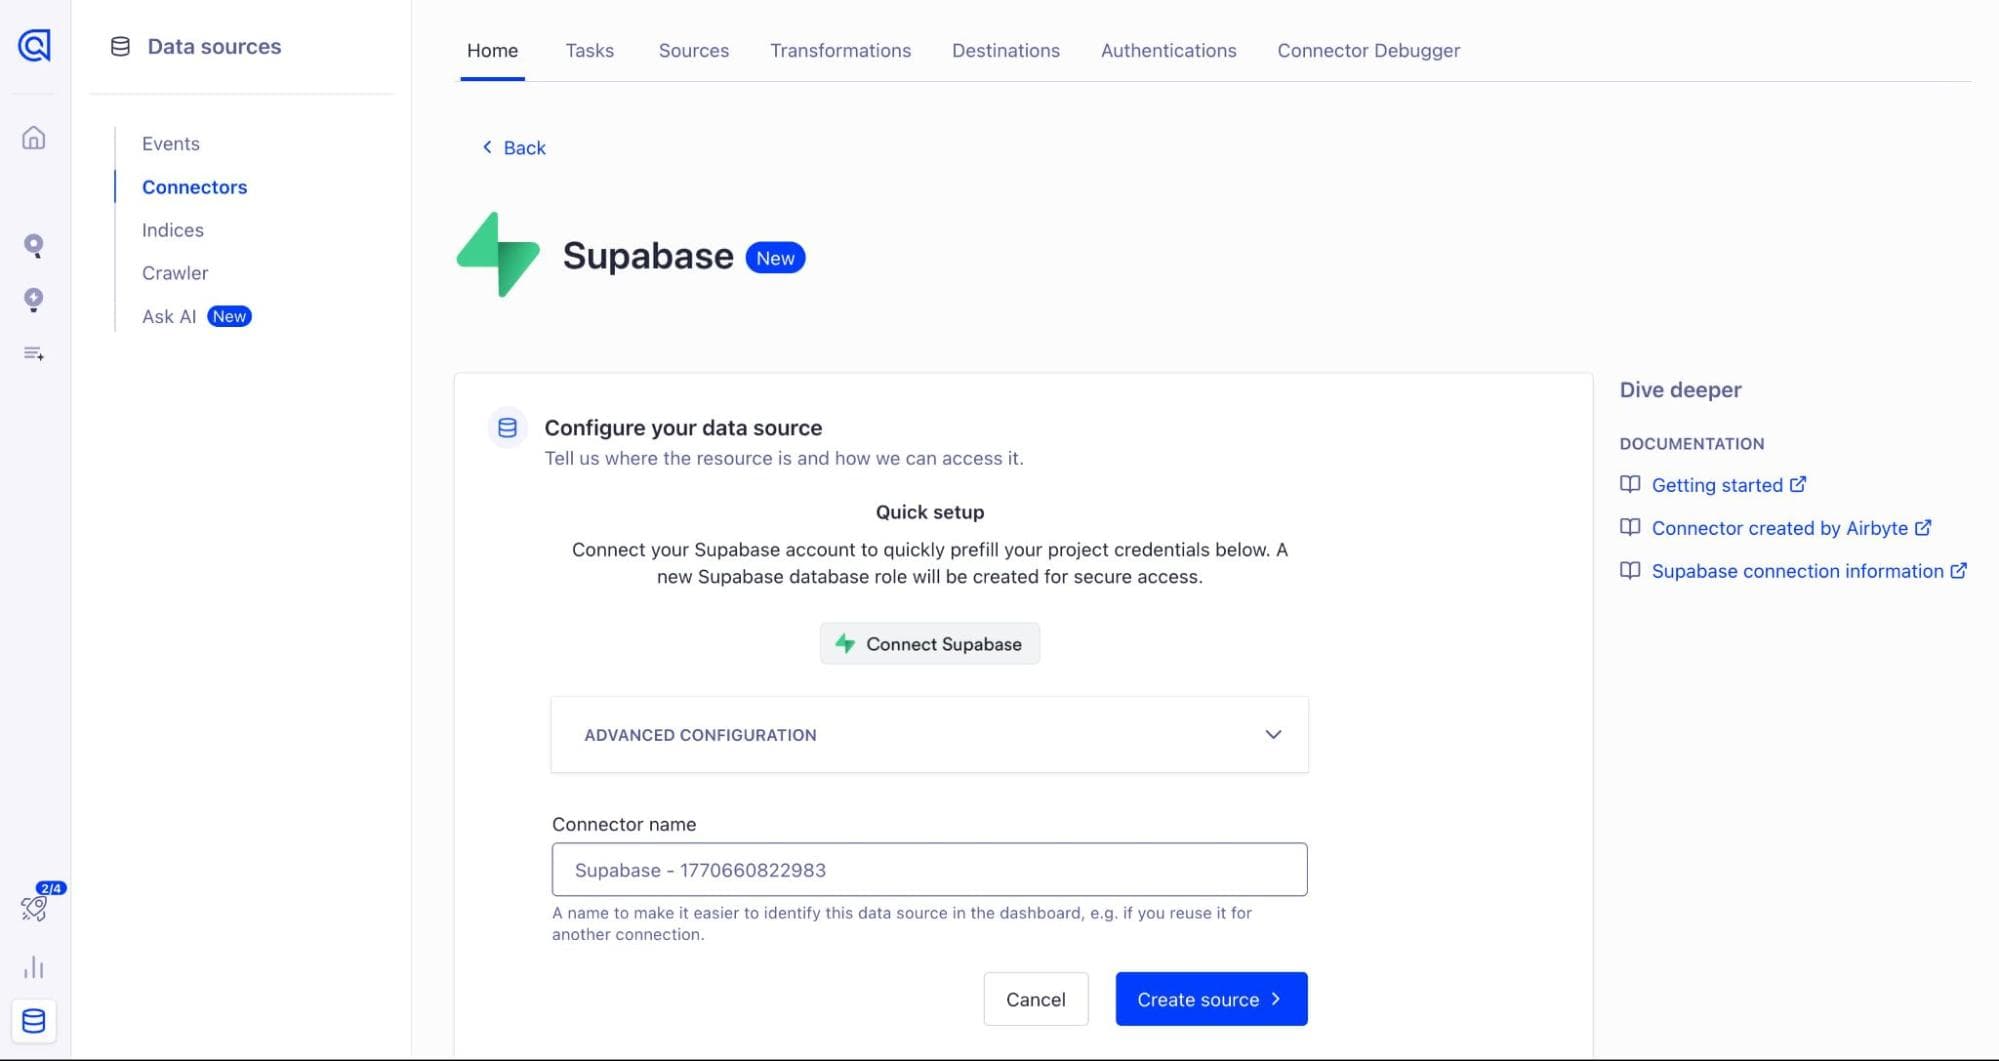
From there, the “connect Supabase” flow handled authentication and then let us pick the Supabase project we wanted (we selected our “brews for you” project). Once selected, Algolia autofilled the connection details (host, port, database, username, password), and we created the source.
Step 3: transform records for the UI (no code)
Two things mattered for our app experience:
1) A details-page URL
We wanted each search result to link to a beer details page, but that URL didn’t exist as a literal column in the database. So we created a url attribute via transformation (based on the beer ID and route pattern).
2) Geo search support
We also wanted “near me” search to ensure that, when users searched for beers or breweries, we surfaced options available in their location. We can unlock this using Algolia GeoSearch, which takes the users longitude and latitude into account. However, you must format your data in a particular way to unlock GeoSearch with the _geoloc attribute. Our database already had latitude/longitude fields, so we transformed them into:

Using an AI assist with our Data Transformation feature, we are able to prepare the index with additional attributes.
In the demo, we used the AI assist inside transformations to generate those attributes quickly, then saved.
Step 4: schedule the sync (and what “real-time” means today)
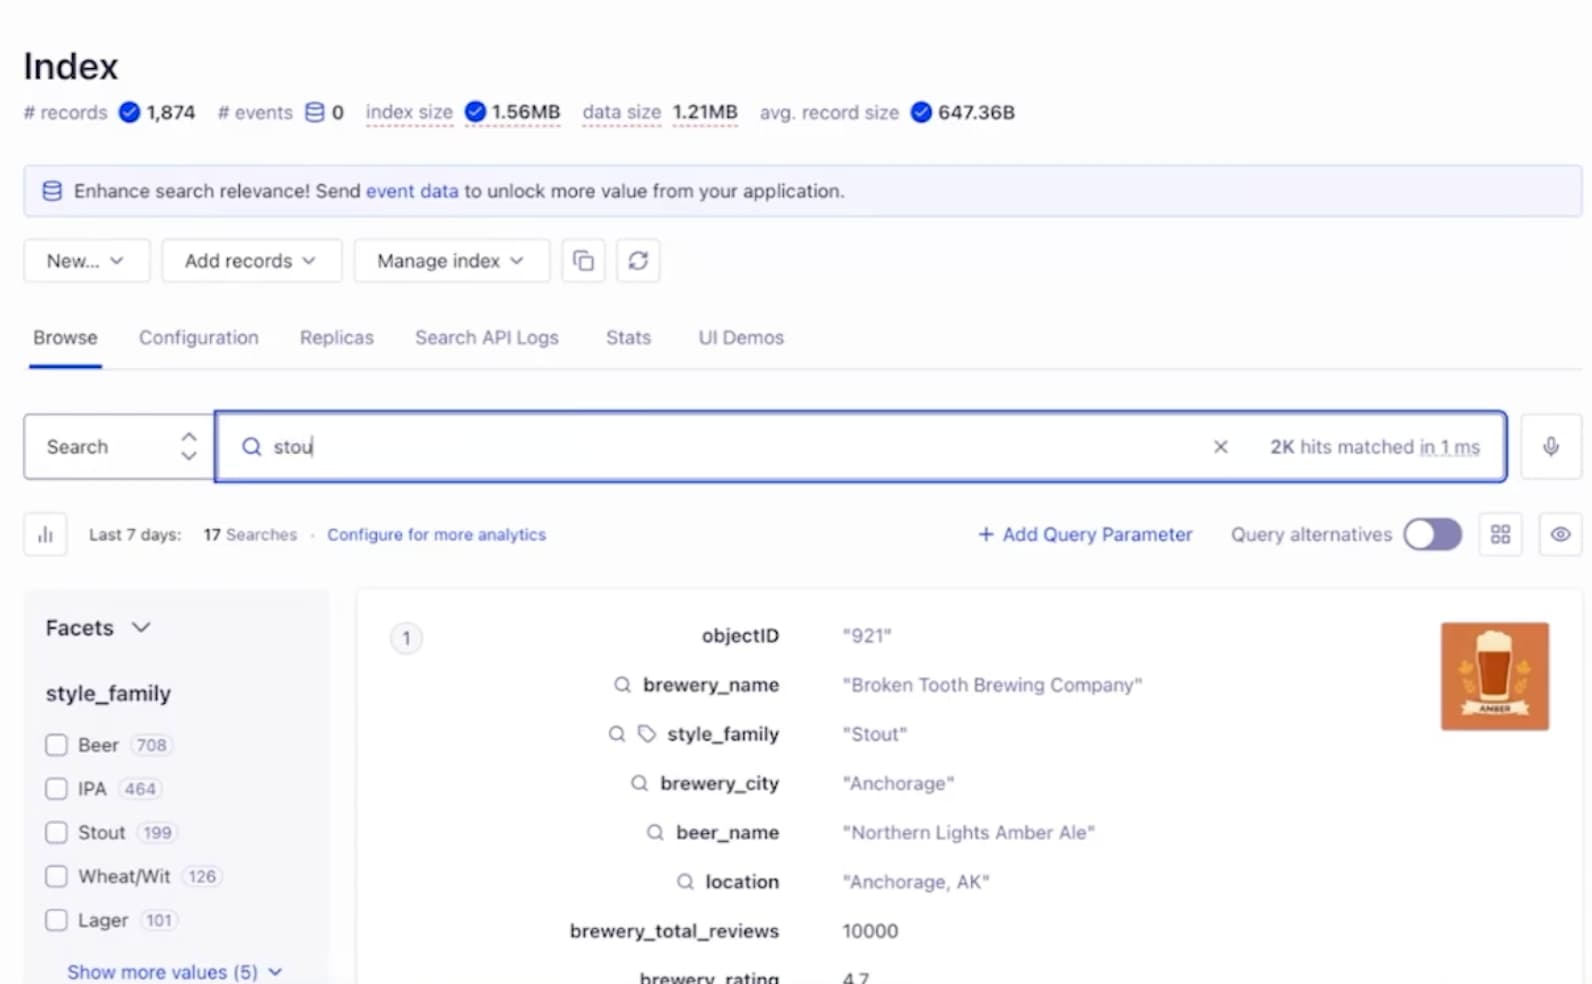
We configured the connector task to index from our flattened view and used beer_id as the objectID. Then we ran the task.
Within seconds, we had 1,874 records indexed.
Step 5: add search UI with SiteSearch (Next.js + shadcn + Tailwind CSS)
With the data in Algolia, we moved to the front end.
Our app is a simple Next.js site built with shadcn/ui and Tailwind CSS. SiteSearch fits naturally here as it's built on the same primitives of shadcn/ui + Tailwind CSS while letting React InstantSearch power the actual search, packaged as reusable components.

You can see how the site looks without search. So, next we turned to the Algolia SiteSearch library.
We chose the dropdown search component and installed it from the shadcn registry. The key point: the component code lives within your codebase, so you can tweak and extend it however you want.
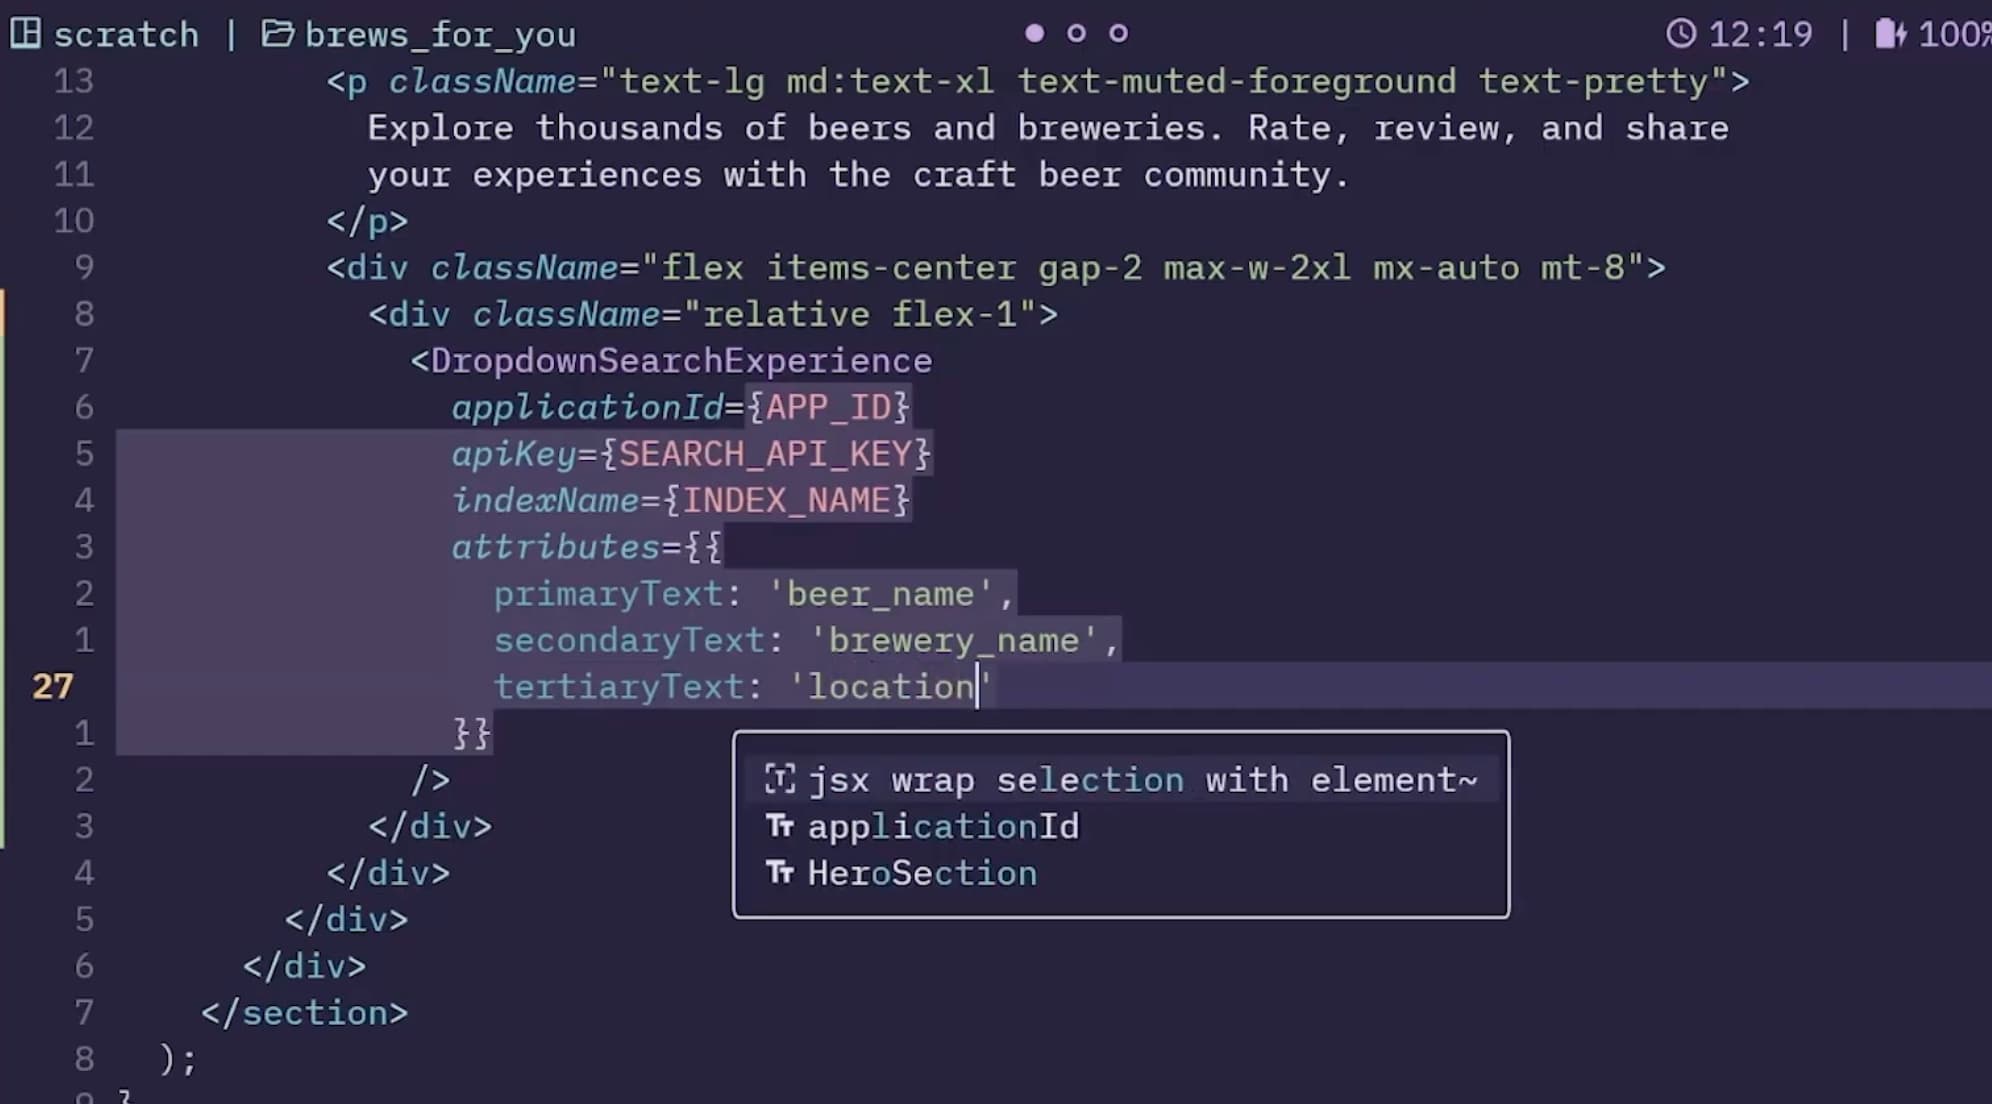
Then we added the component in our hero section and configured it with:
- Algolia
applicationId
- a public
searchApiKey
indexName (ours was brews_for_you)- attribute mapping for results display:
- primary text: beer name
- secondary text: brewery name
- tertiary text: location
- image: beer image
- url: details-page URL
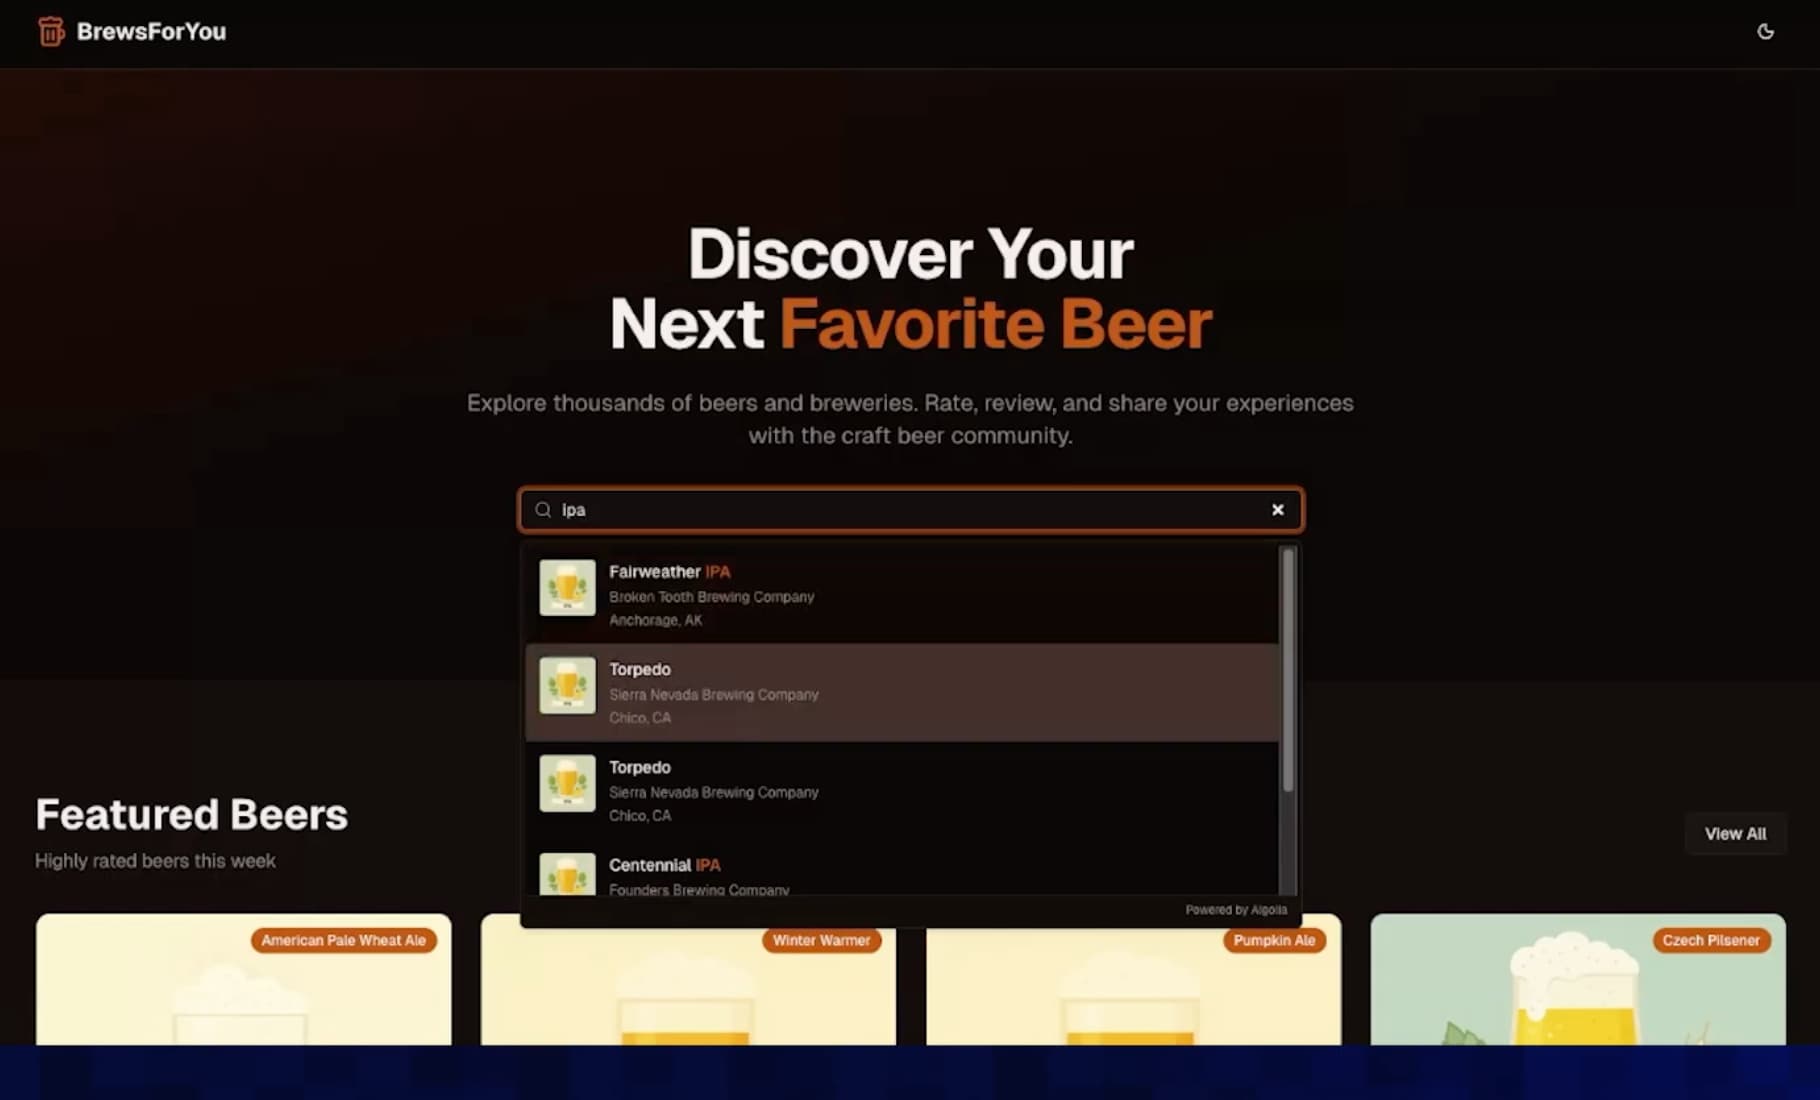
Once we refreshed the page: search bar, results, click-through. Done.
Step 6: make results local with geo search parameters
At first, the results were technically correct—but not useful. Searching “stout” surfaced something in Anchorage, Alaska. That’s great data… for someone in Alaska.
We can fix that by adding search parameters to the search component, mirroring what we tested earlier in the dashboard:
- search around the user
- use IP-based geolocation
Conceptually:
searchParameters={{ a
  roundLatLngViaIP: true,
}}
After that, searching for “IPA” returned breweries near the user (Paul got results around Michigan, and Roger gets results near in Texas), and the app immediately felt more relevant.
Notes on JSON fields and relational data
If your Supabase schema includes JSON columns or more complex relationships, you’ll likely want to:
- flatten via a view (like we did), and/or
- use transformations to reshape JSON into index-friendly attributes
The connector can get the data across, but the goal is to make sure what lands in Algolia matches what your UI and ranking expect.
What we shipped in the demo
By the end, we had:
- data synced from Supabase into Algolia via the connector
- transformed records by adding two new properties:
url and _geoloc
- a SiteSearch dropdown UI added to a Next.js app
- geo-aware “near me” results
- a search experience that blends nicely with what the site is trying to accomplish
If you’re building on Supabase and want search that’s fast, typo-tolerant, and easy to integrate, this workflow is a great place to start.
You can watch this entire presentation below.


%20(2).svg)
